GCP Example: deploy GCS bucket
In this quick start we will show you how you can use Hyper Cloud Automation to deploy a GCS bucket as a part of a simple architecture. The example will walk you through creating a simple environment, adding a module, and deploy it.
Prerequisite
For this example we will assume that you already have a GCP project created.
- Go to your cloud shell https://shell.cloud.google.com/
- Create service account:
gcloud --project <YOUR_PROJECT_ID> iam service-accounts create xoogify-example - Grant
Storage Adminrole to the account:gcloud projects add-iam-policy-binding <YOUR_PROJECT_ID> --member serviceAccount:xoogify-example@<YOUR_PROJECT_ID>.iam.gserviceaccount.com --role roles/storage.admin - Create a service account key:
gcloud --project <YOUR_PROJECT_ID> iam service-accounts keys create credentials.json --iam-account xoogify-example@<YOUR_PROJECT_ID>.iam.gserviceaccount.com - Note down the value of the key by doing
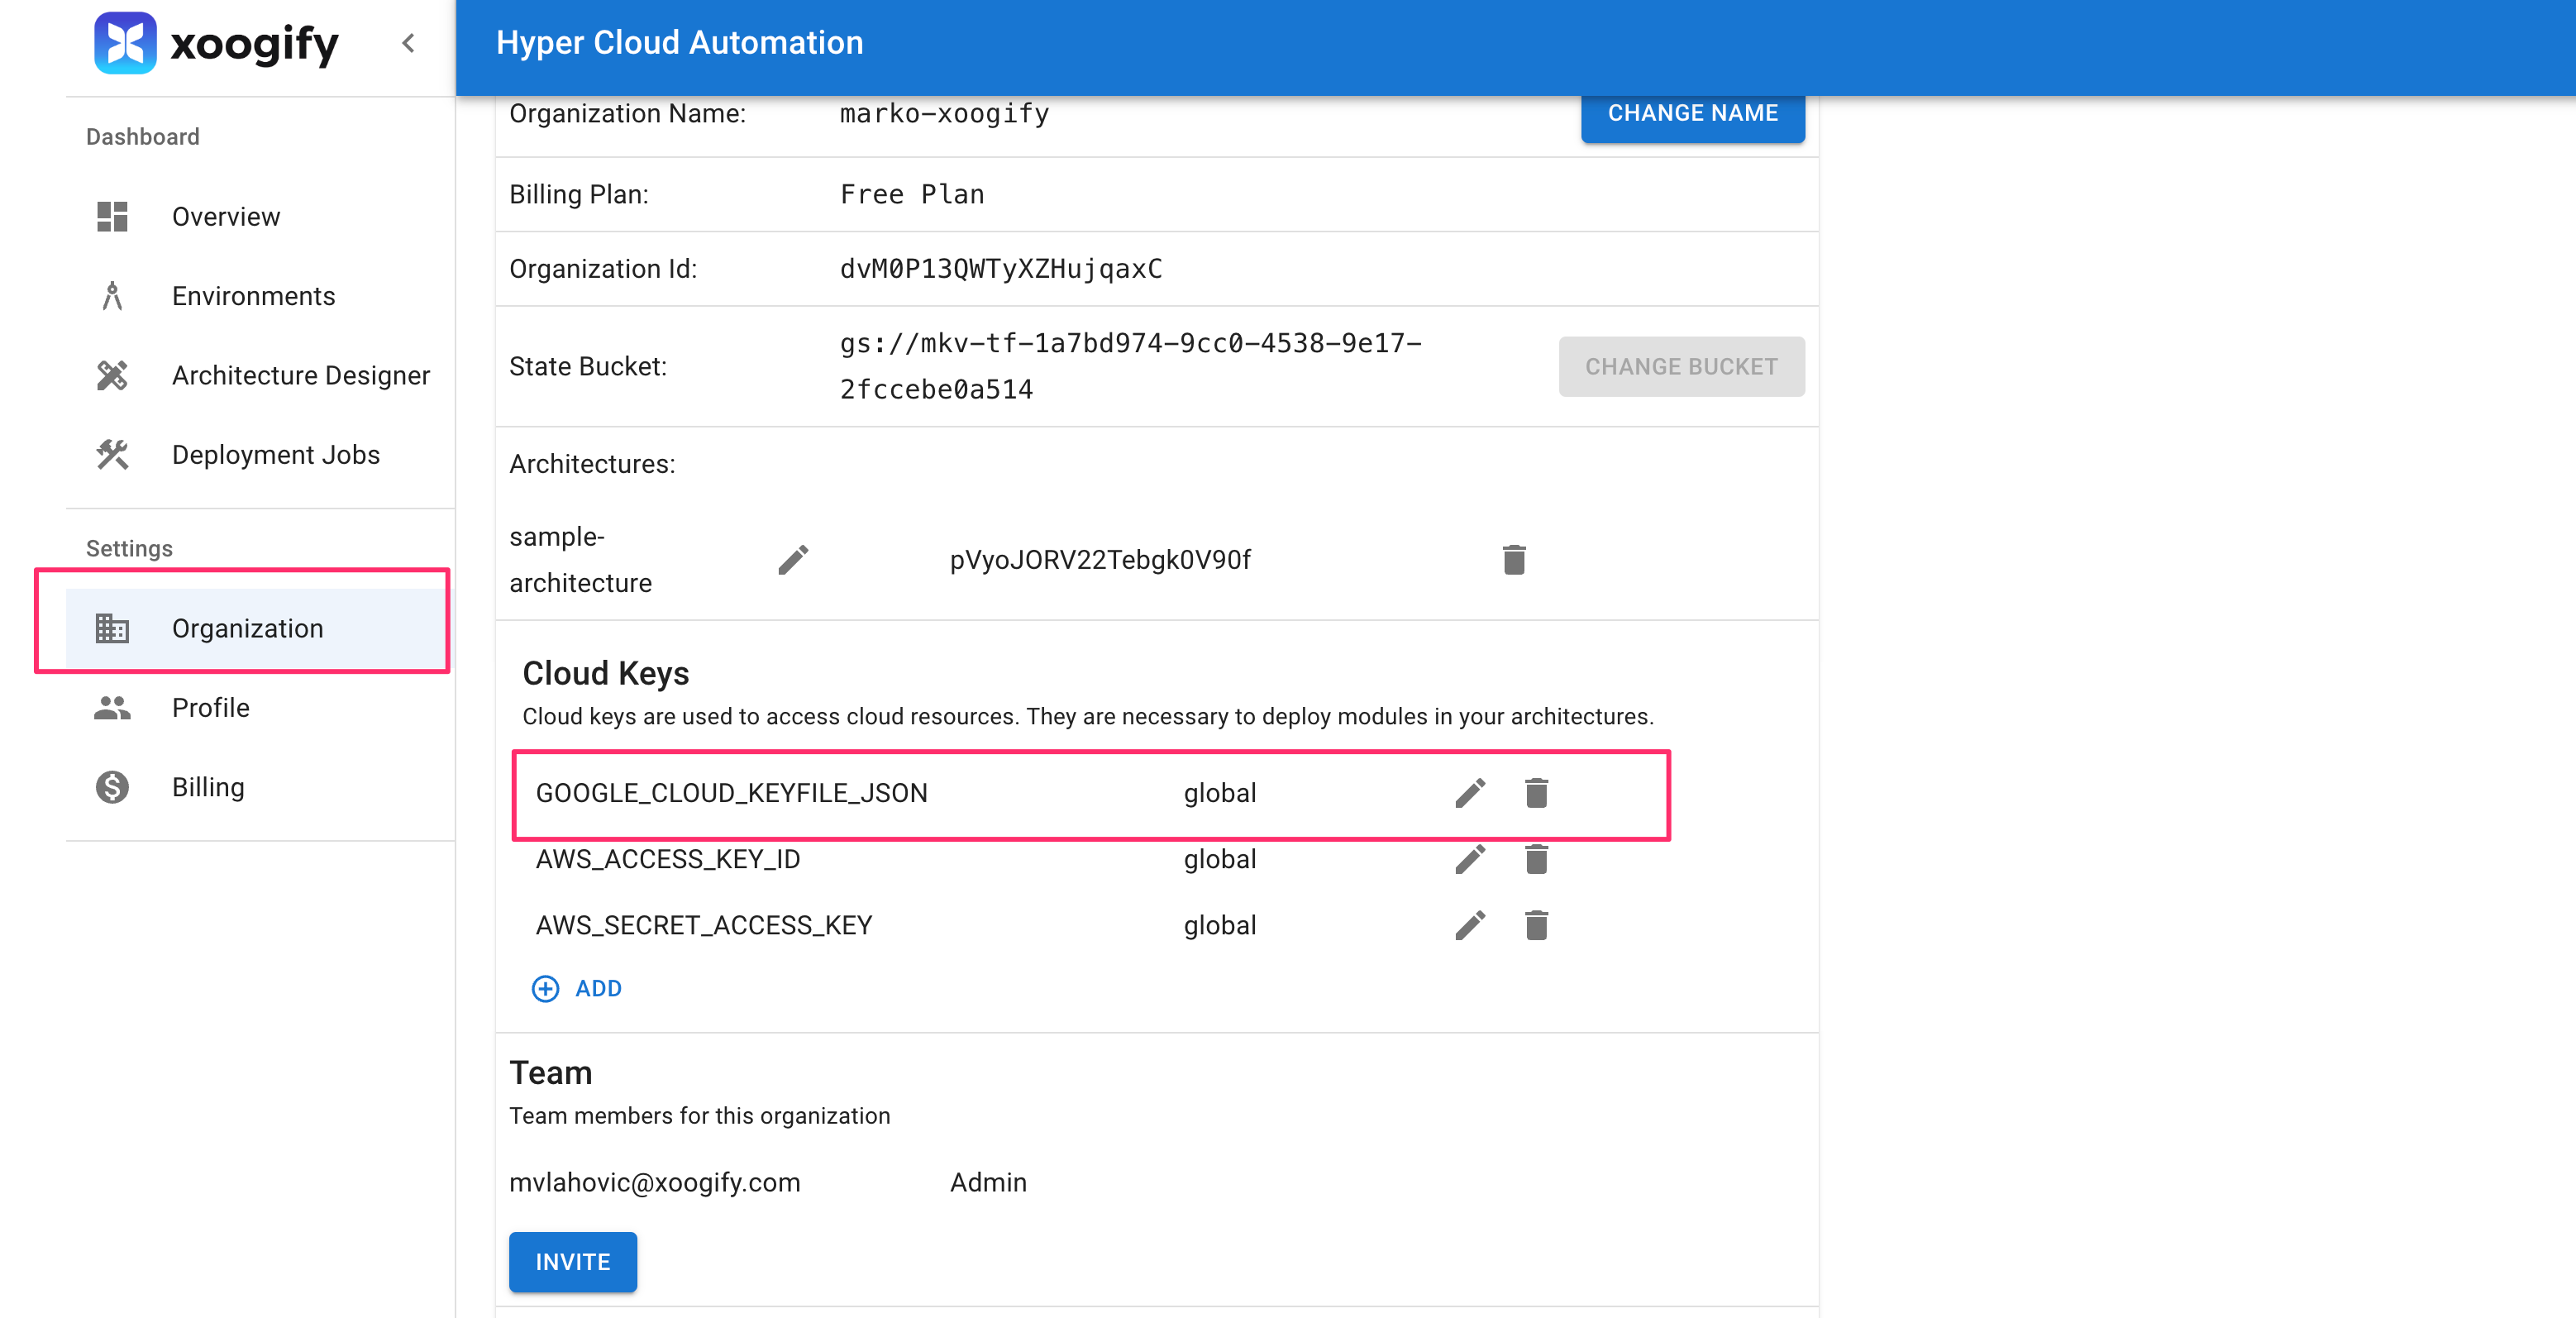
cat credentials.json - In the Hyper Cloud Automation click on Organization in the left hand navigation menu.
- Scroll to the Cloud Keys section.
- Press on
+Addbutton. - For
Cloud KeychooseGOOGLE_CLOUD_KEYFILE_JSON. - Paste the value of the
credentials.jsonin the above steps - For
Environmentchooseglobal. - Press
Savebutton - You should have something like this
Create environment
In this example we will create a simple environment which consist of a module that deploys a GCS bucket.
- In the left naviation menu select
Environments - Click on
Add Environment - Name your environment
example-gcs-environment - Press
Add - Select
EXAMPLE-GCS-ENVIRONMENTin the tabs - Press on the
+button in theRoot of the Environment - Select
GCP Project Data SourceData SourcetipPress
Expand Environmentbutton to expand/collapse the tree - In the
GCP Project Data Sourcenode press on the button and fill in theProject IDwith the value of<YOUR_PROJECT_ID>from the Prerequisites section - Press
Save - On
GCP Project Data Sourcenode press and selectGCS BucketModule - Click on button and set the settings like in this image
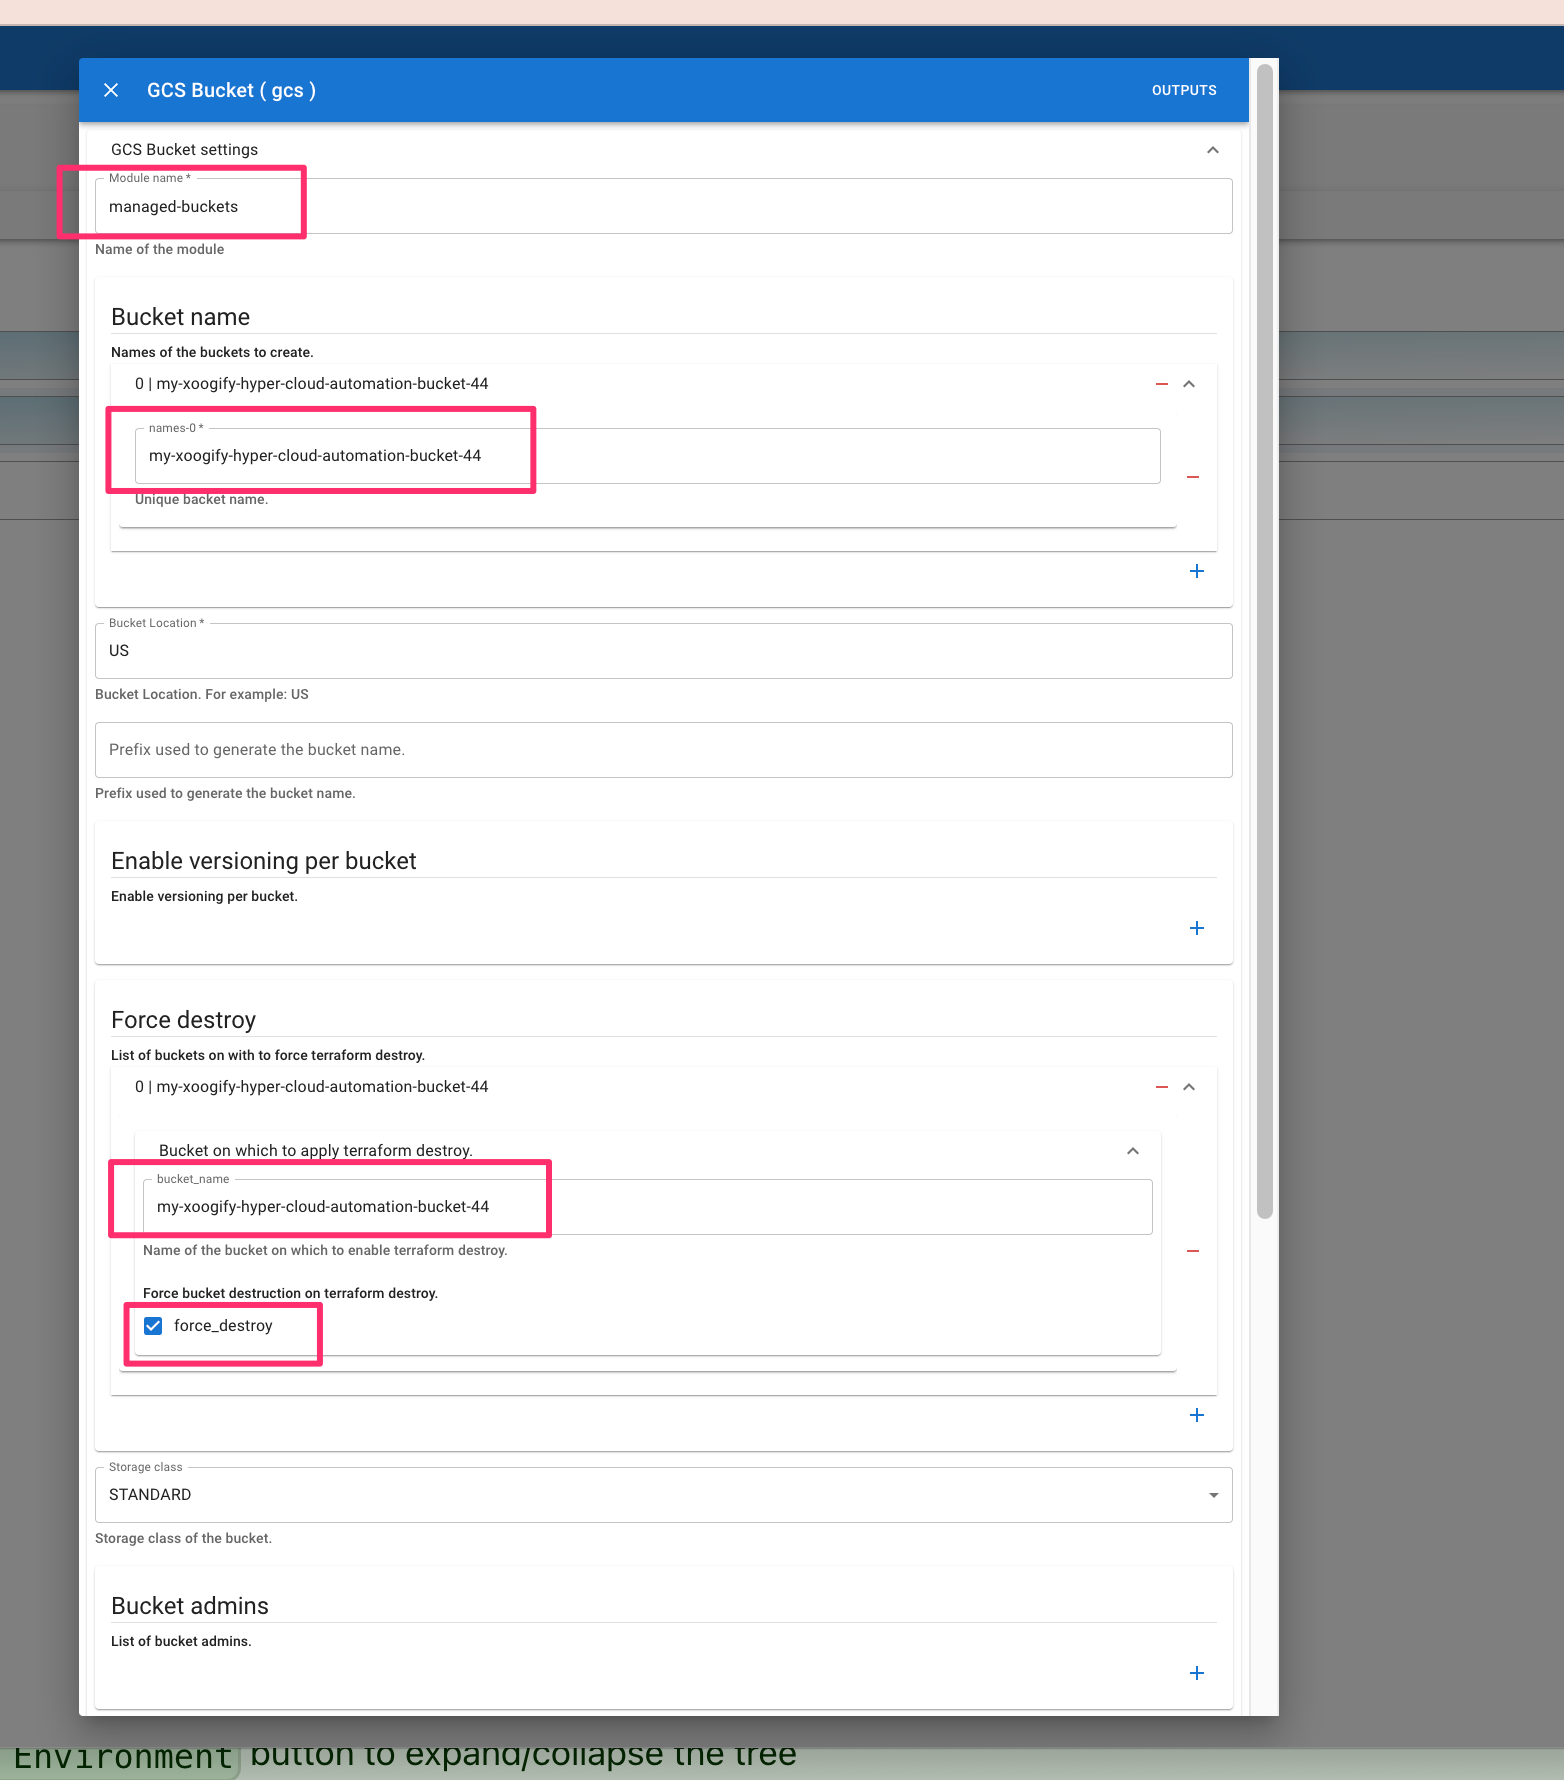
- Scroll down and press
Save.
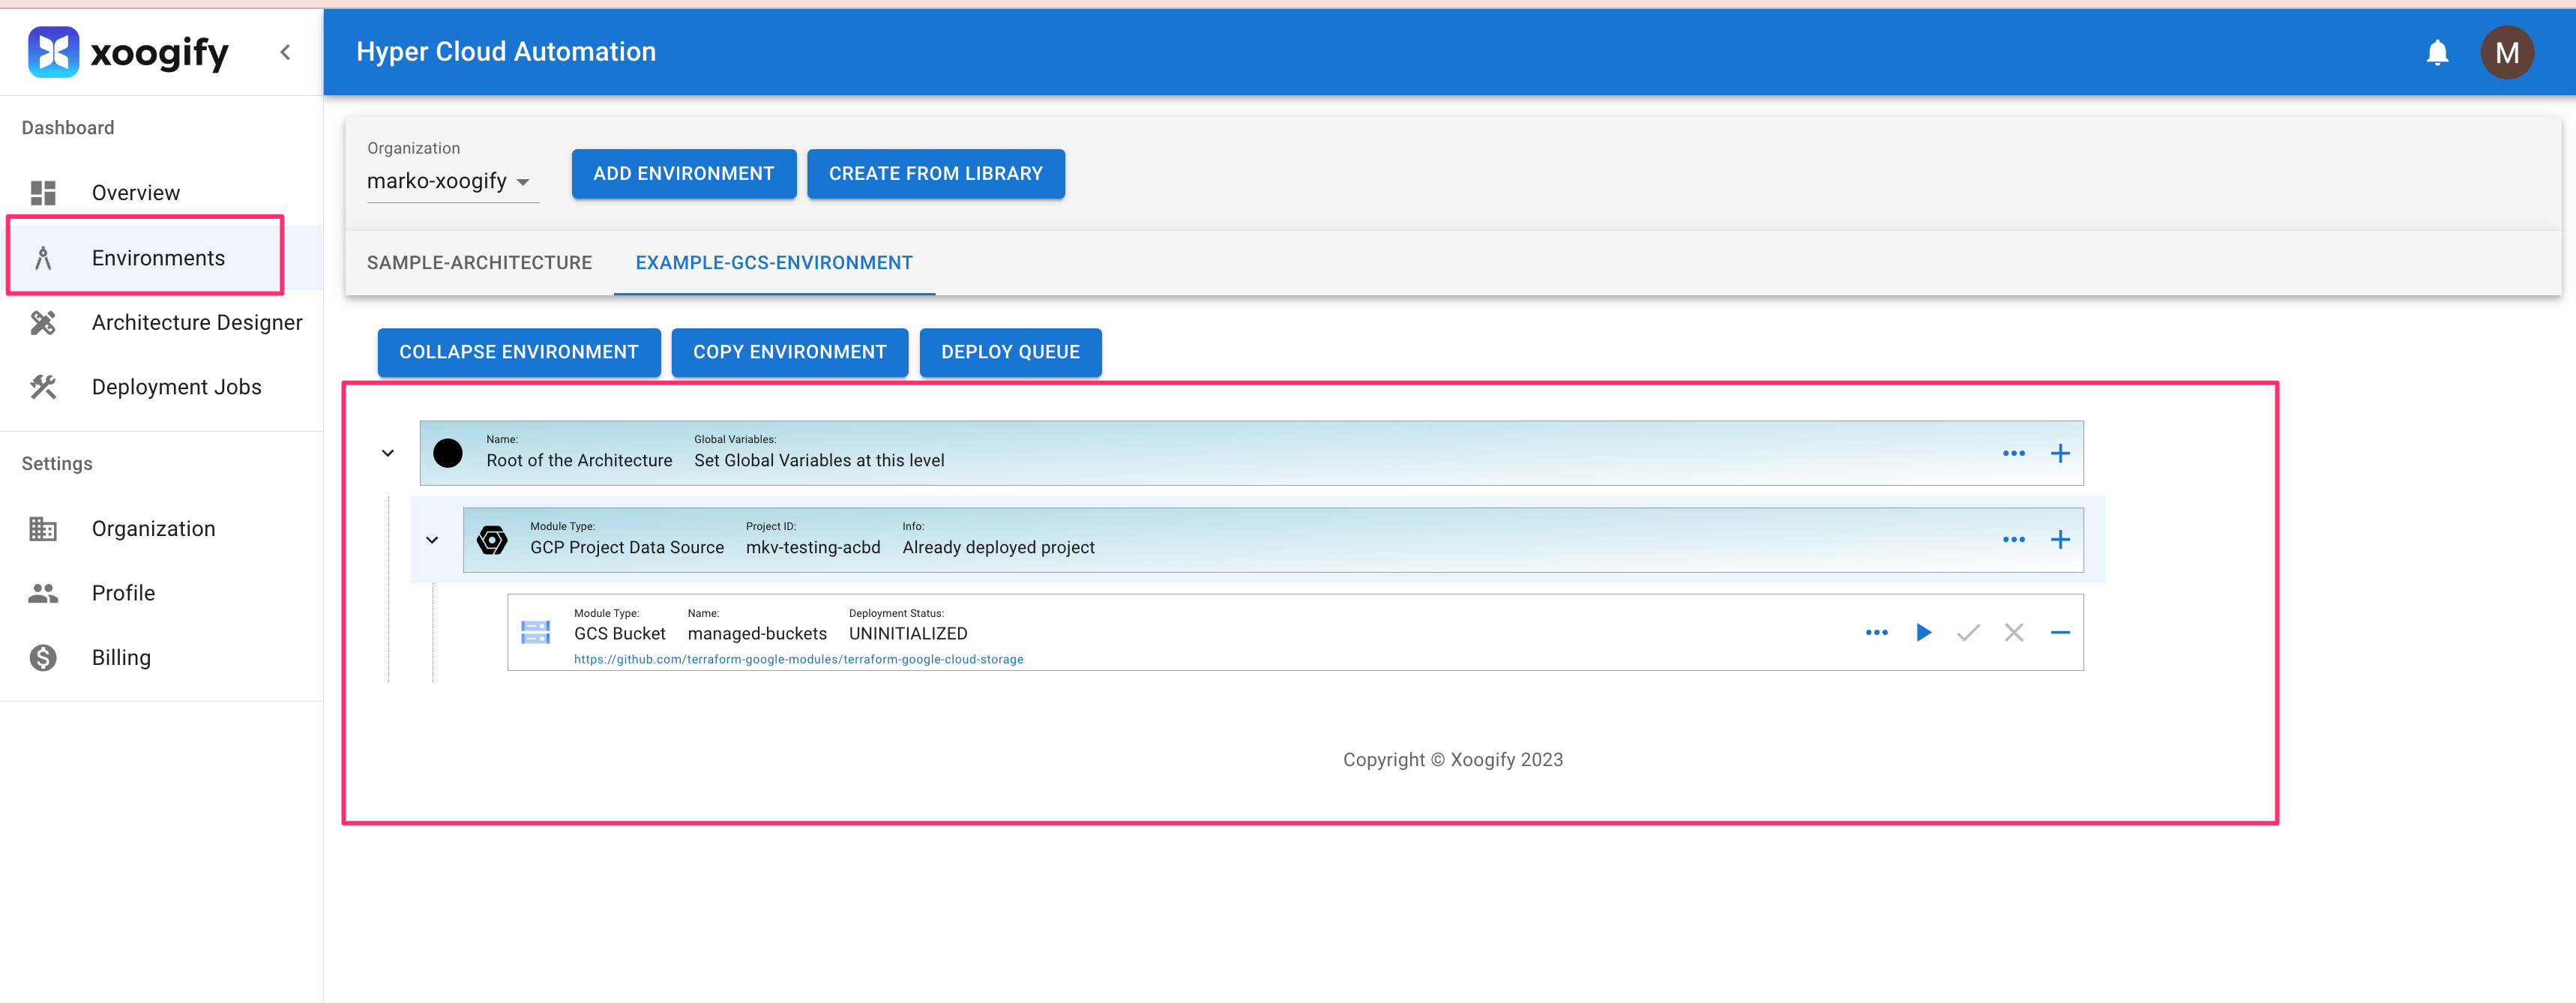
Your first simple environment should look something like this:
Deploy
Deployment process consists of running a plan action folowed by approval process and then running apply
- In your environment locate
GCS Bucketmodule - Press on the in the module to start the
plan. Notice that theDeployment Statuswill change.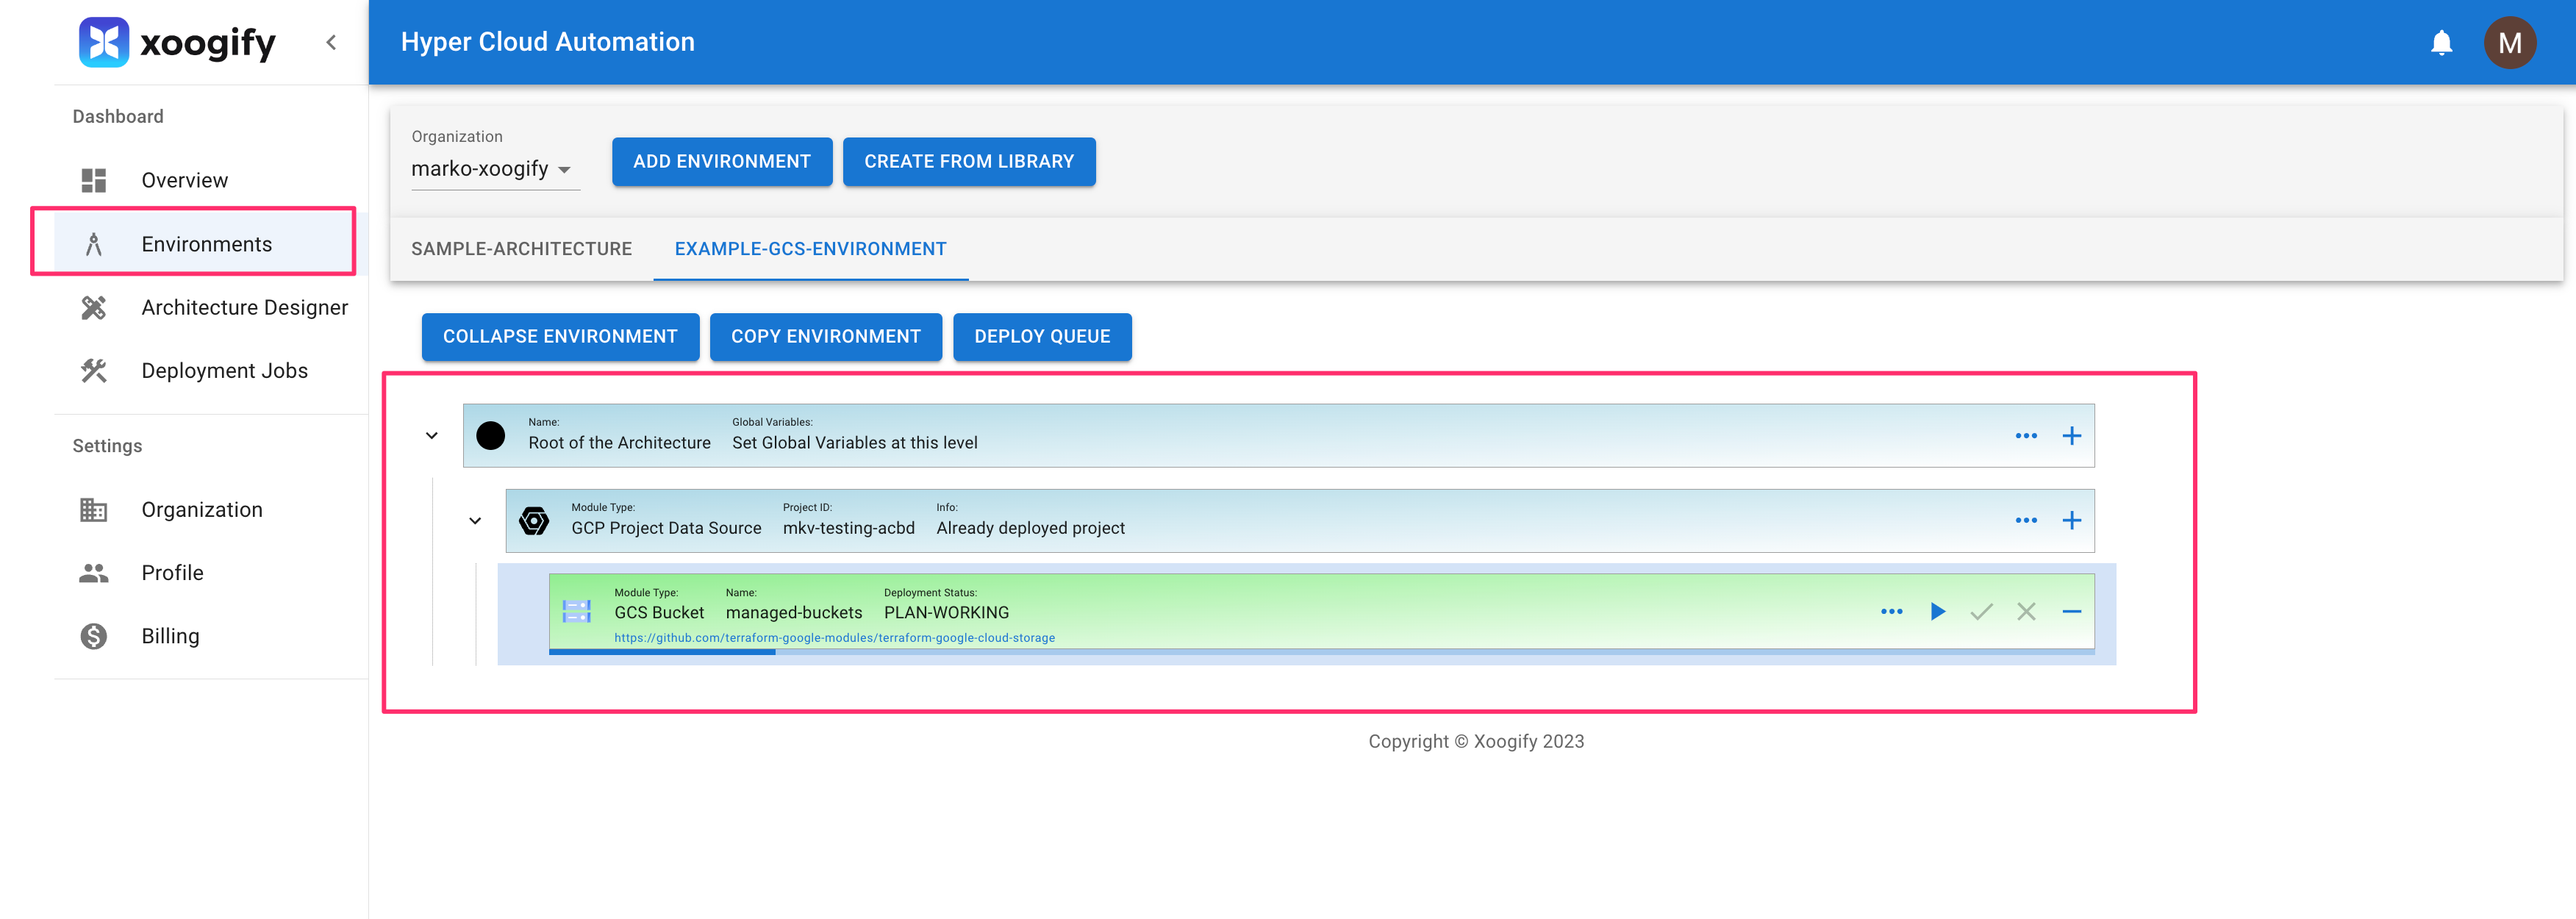
- Once the
Deployment Statusis changed toPLAN SUCCESSclick on button to pop up the deploymentPLAN - In the top right corner press
TERRAFORM-APPLYbutton - Wait for deployment to finish.

- Go to your GCP Cloud Console
- Go to Cloud Storage
- You will find the bucket that has been deployed
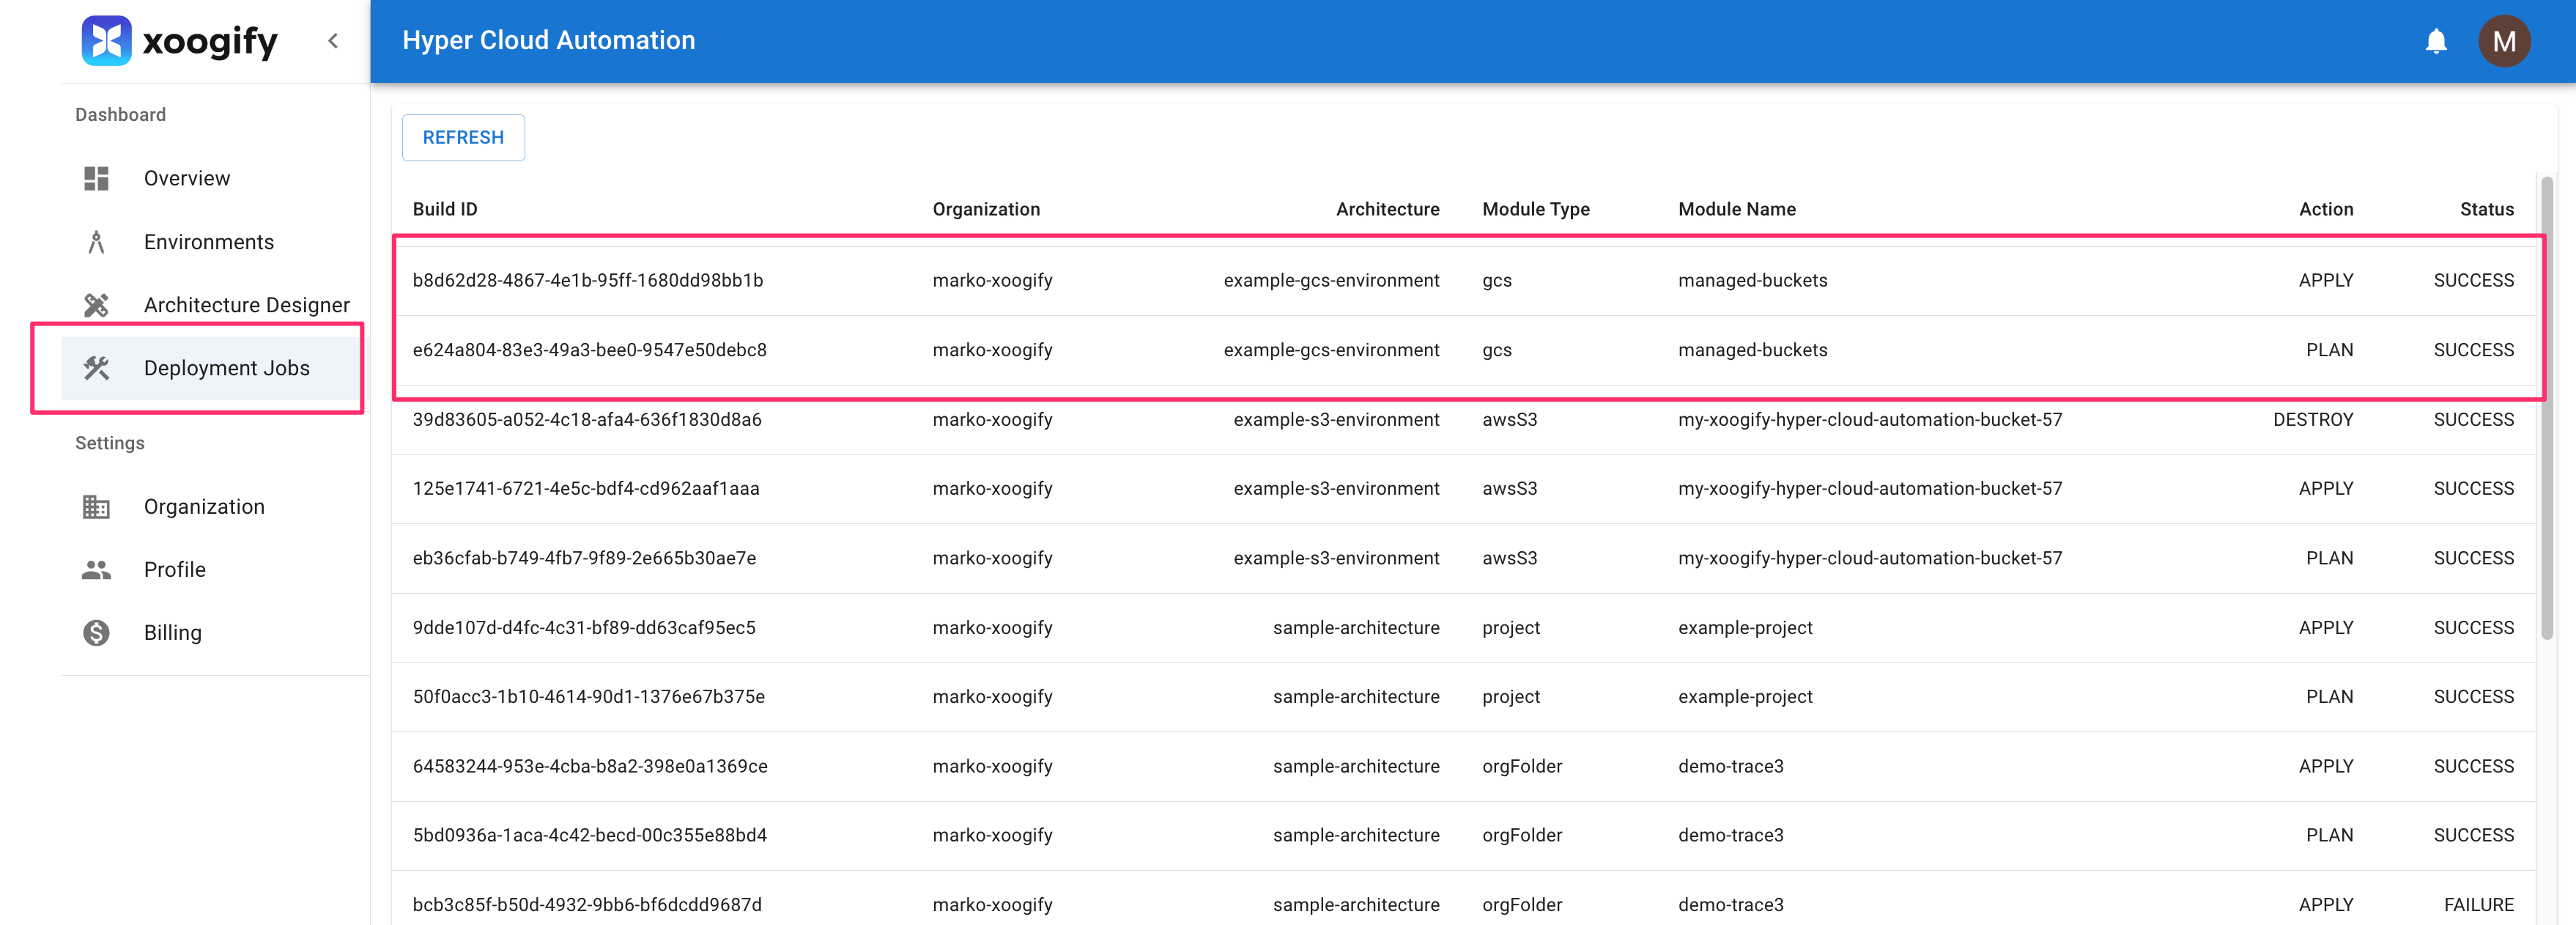
To review deployments log do:
- In the left navigation menu click on
Deployment Jobs - Click on the deployment job IDs to see the full logs
Destroy the bucket
- In the naviagion menu on the left select
Environments - In the tabs select
EXAMPLE-GCS-ENVIRONMENT - Click on
Expand Environment - Click on button on the
GCS Bucketmodule. - Confirm the destruction plan
- Wait for
Destroyto complete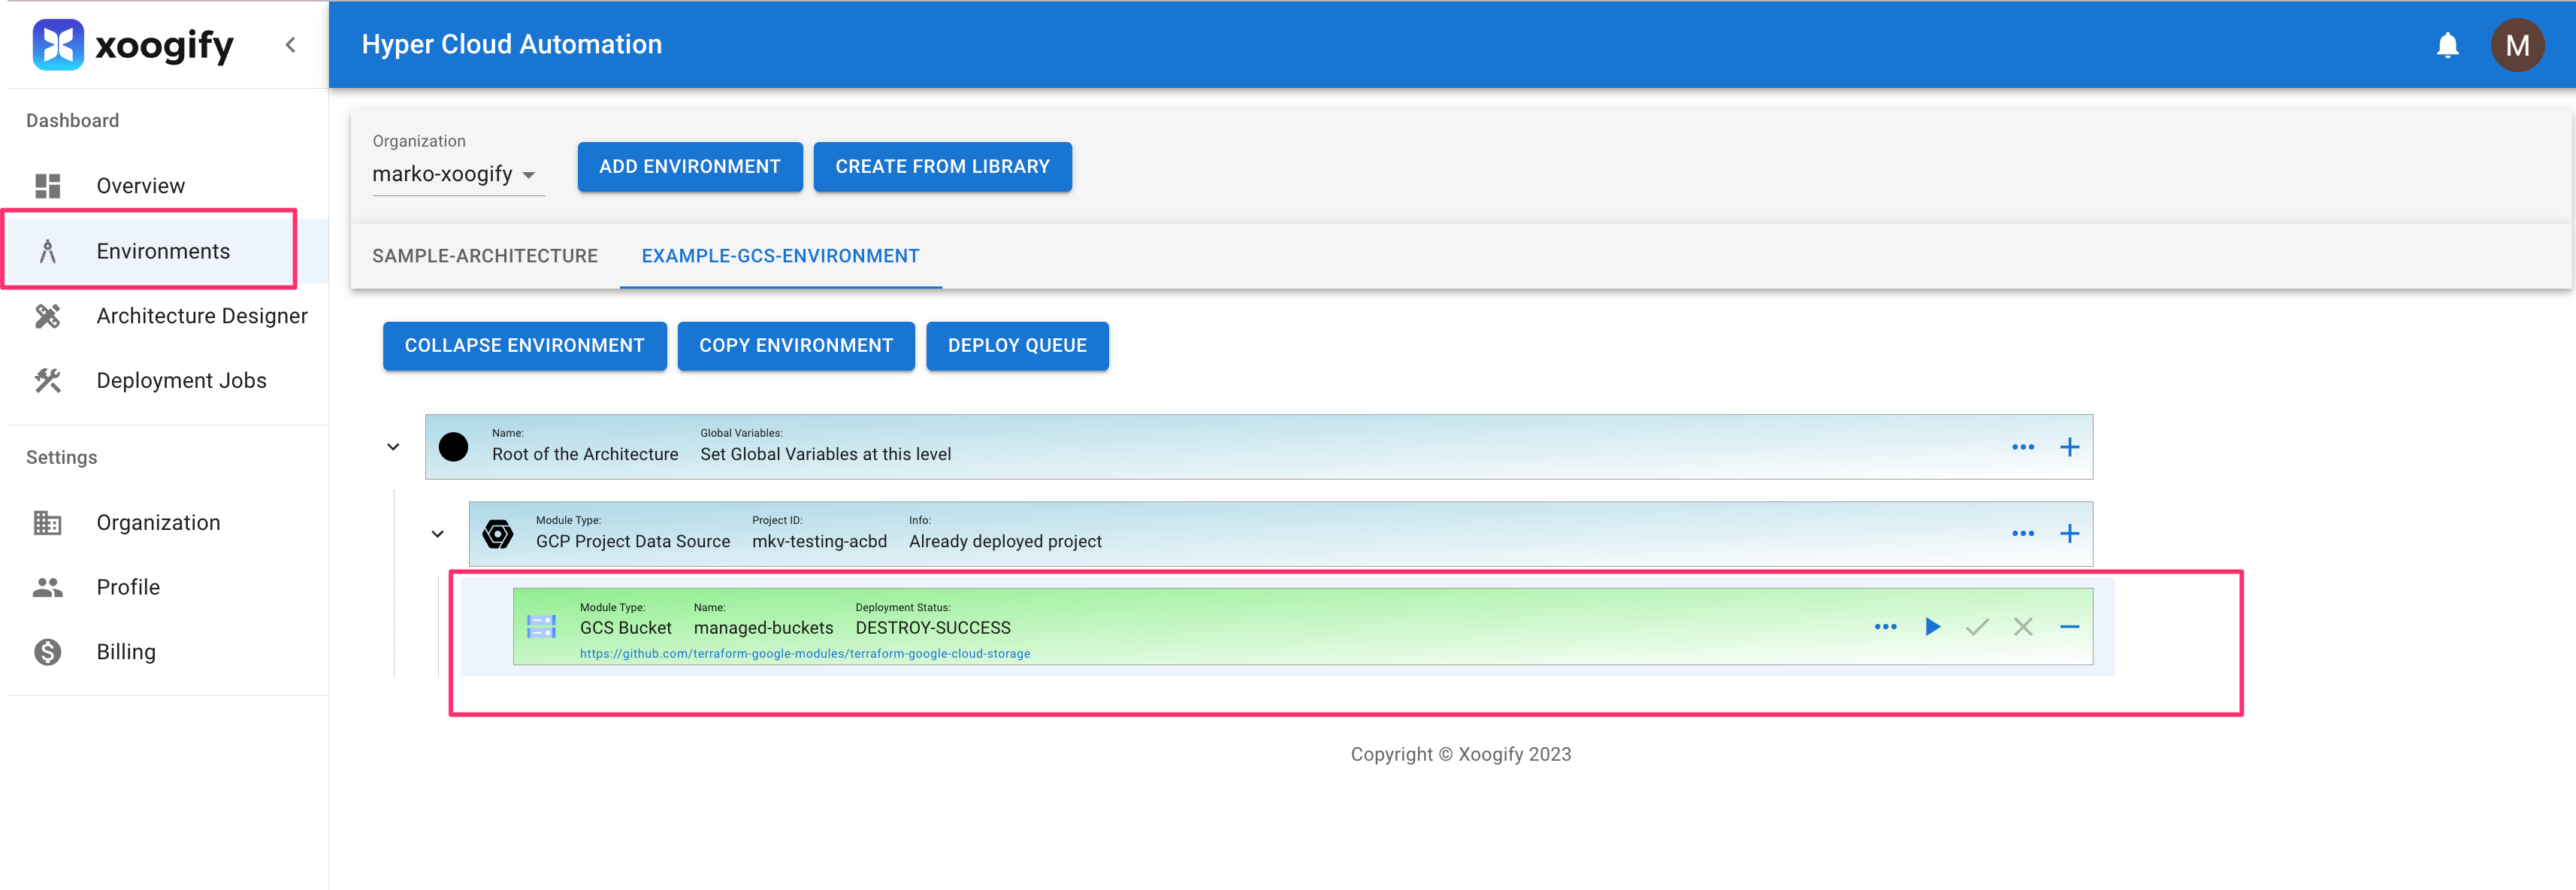
- Go to your GCP Cloud Console
- Go to Cloud Storage
- The bucket is deleted
Cleanup
- In the left navigation menu click on
Organization - Delete the environment
EXAMPLE-GCS-ENVIRONMENT. See also delete envrionment - Delete the Service Account Key created in prerequisite