AWS Example: deploy s3 bucket
In this quick start we will show you how you can use Hyper Cloud Automation to deploy an s3 bucket. The example will walk you through creating a simple environment, adding a module, and deploy it.
Prerequiste
In your aws account create a user with the S3FullAccess policy and upload the access keys to the Hyper Cloud Automation.
- Login to your AWS account
- Go to IAM
- Create a user called xoogify-automation
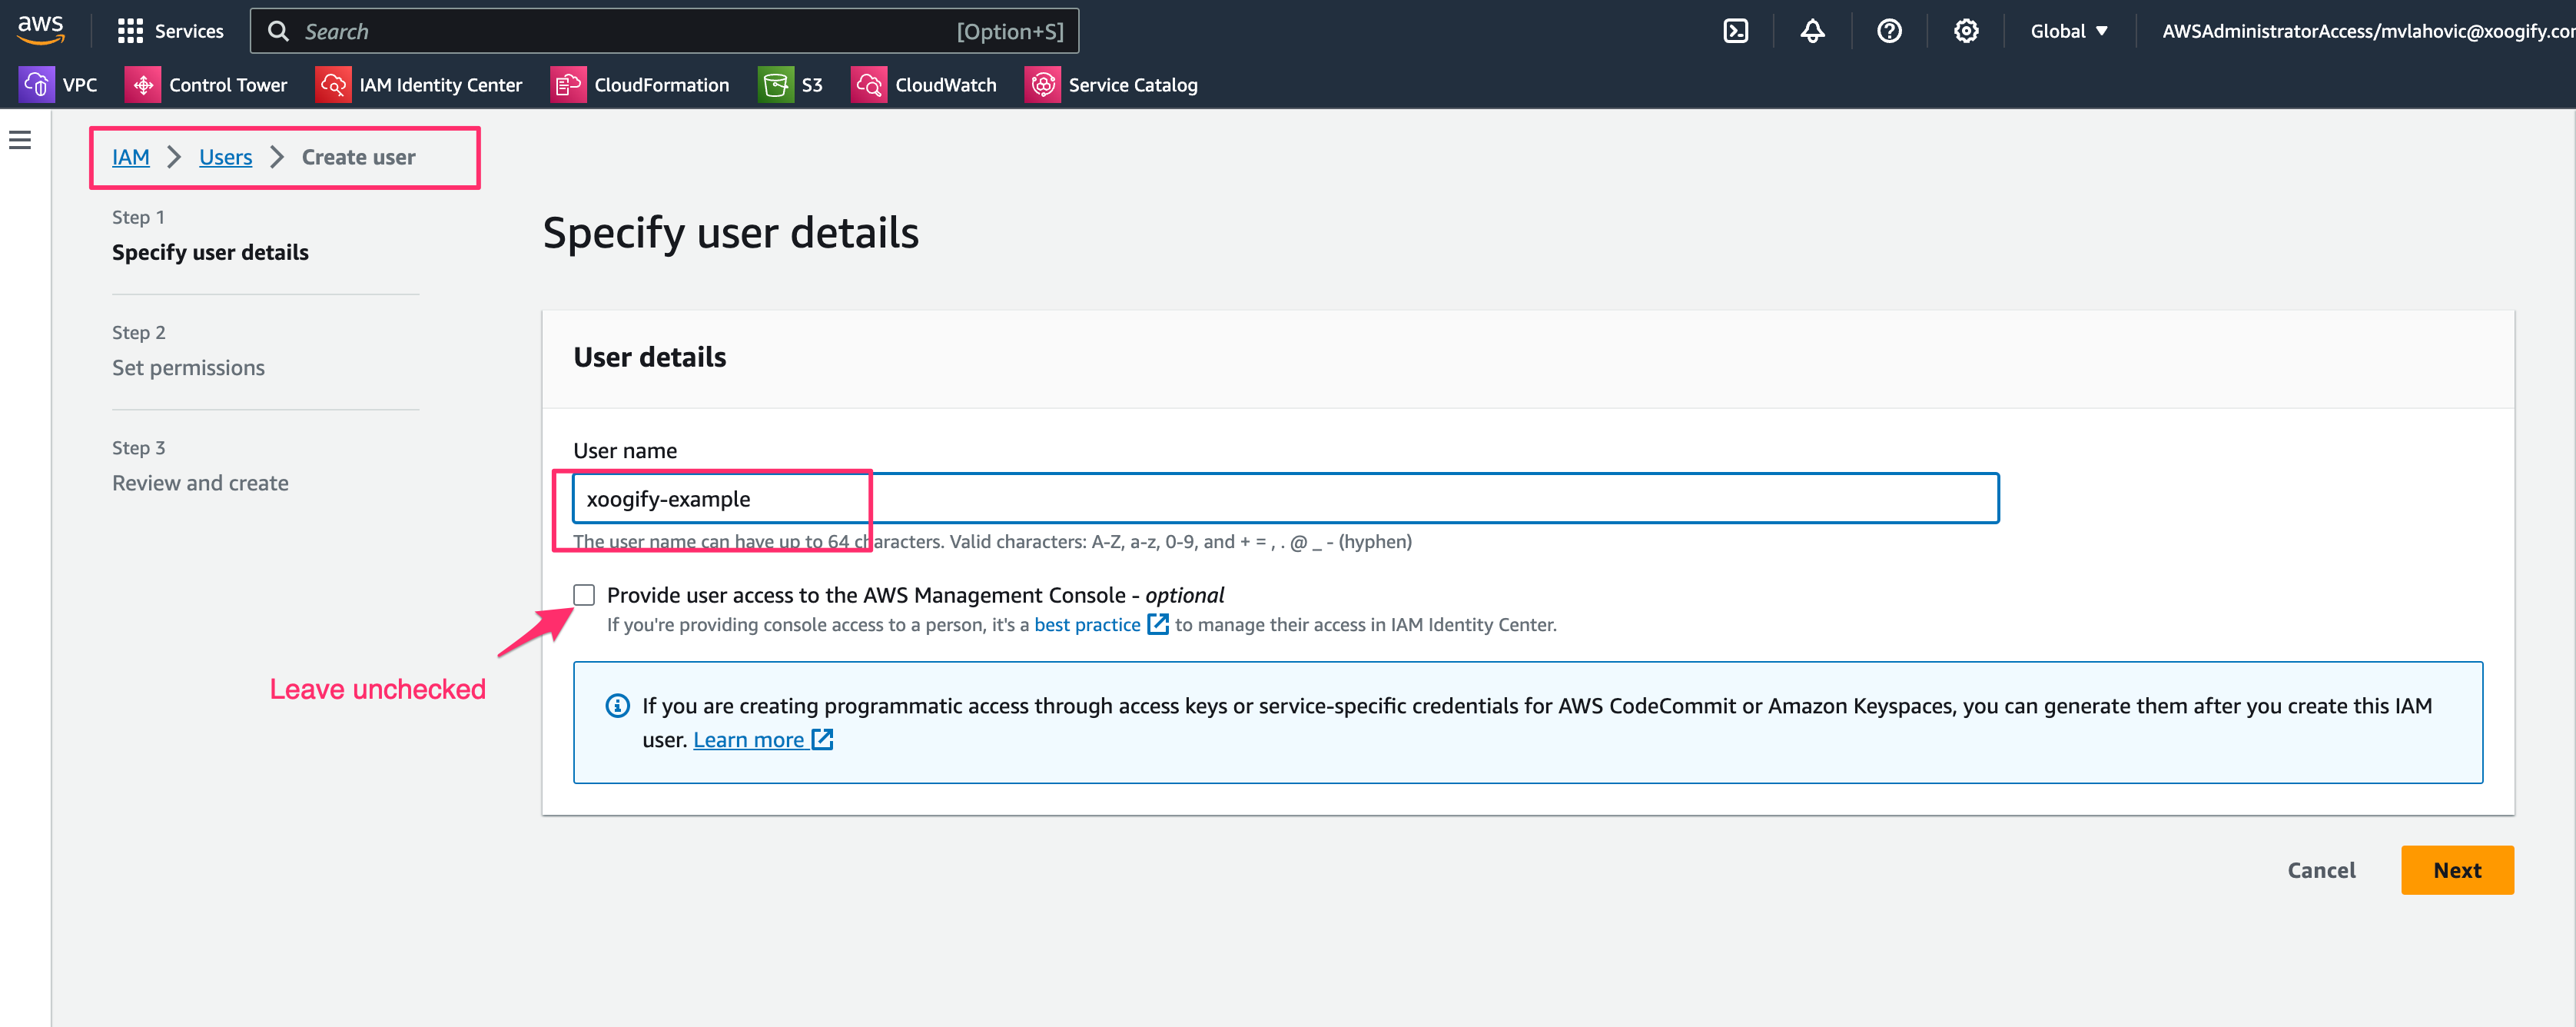
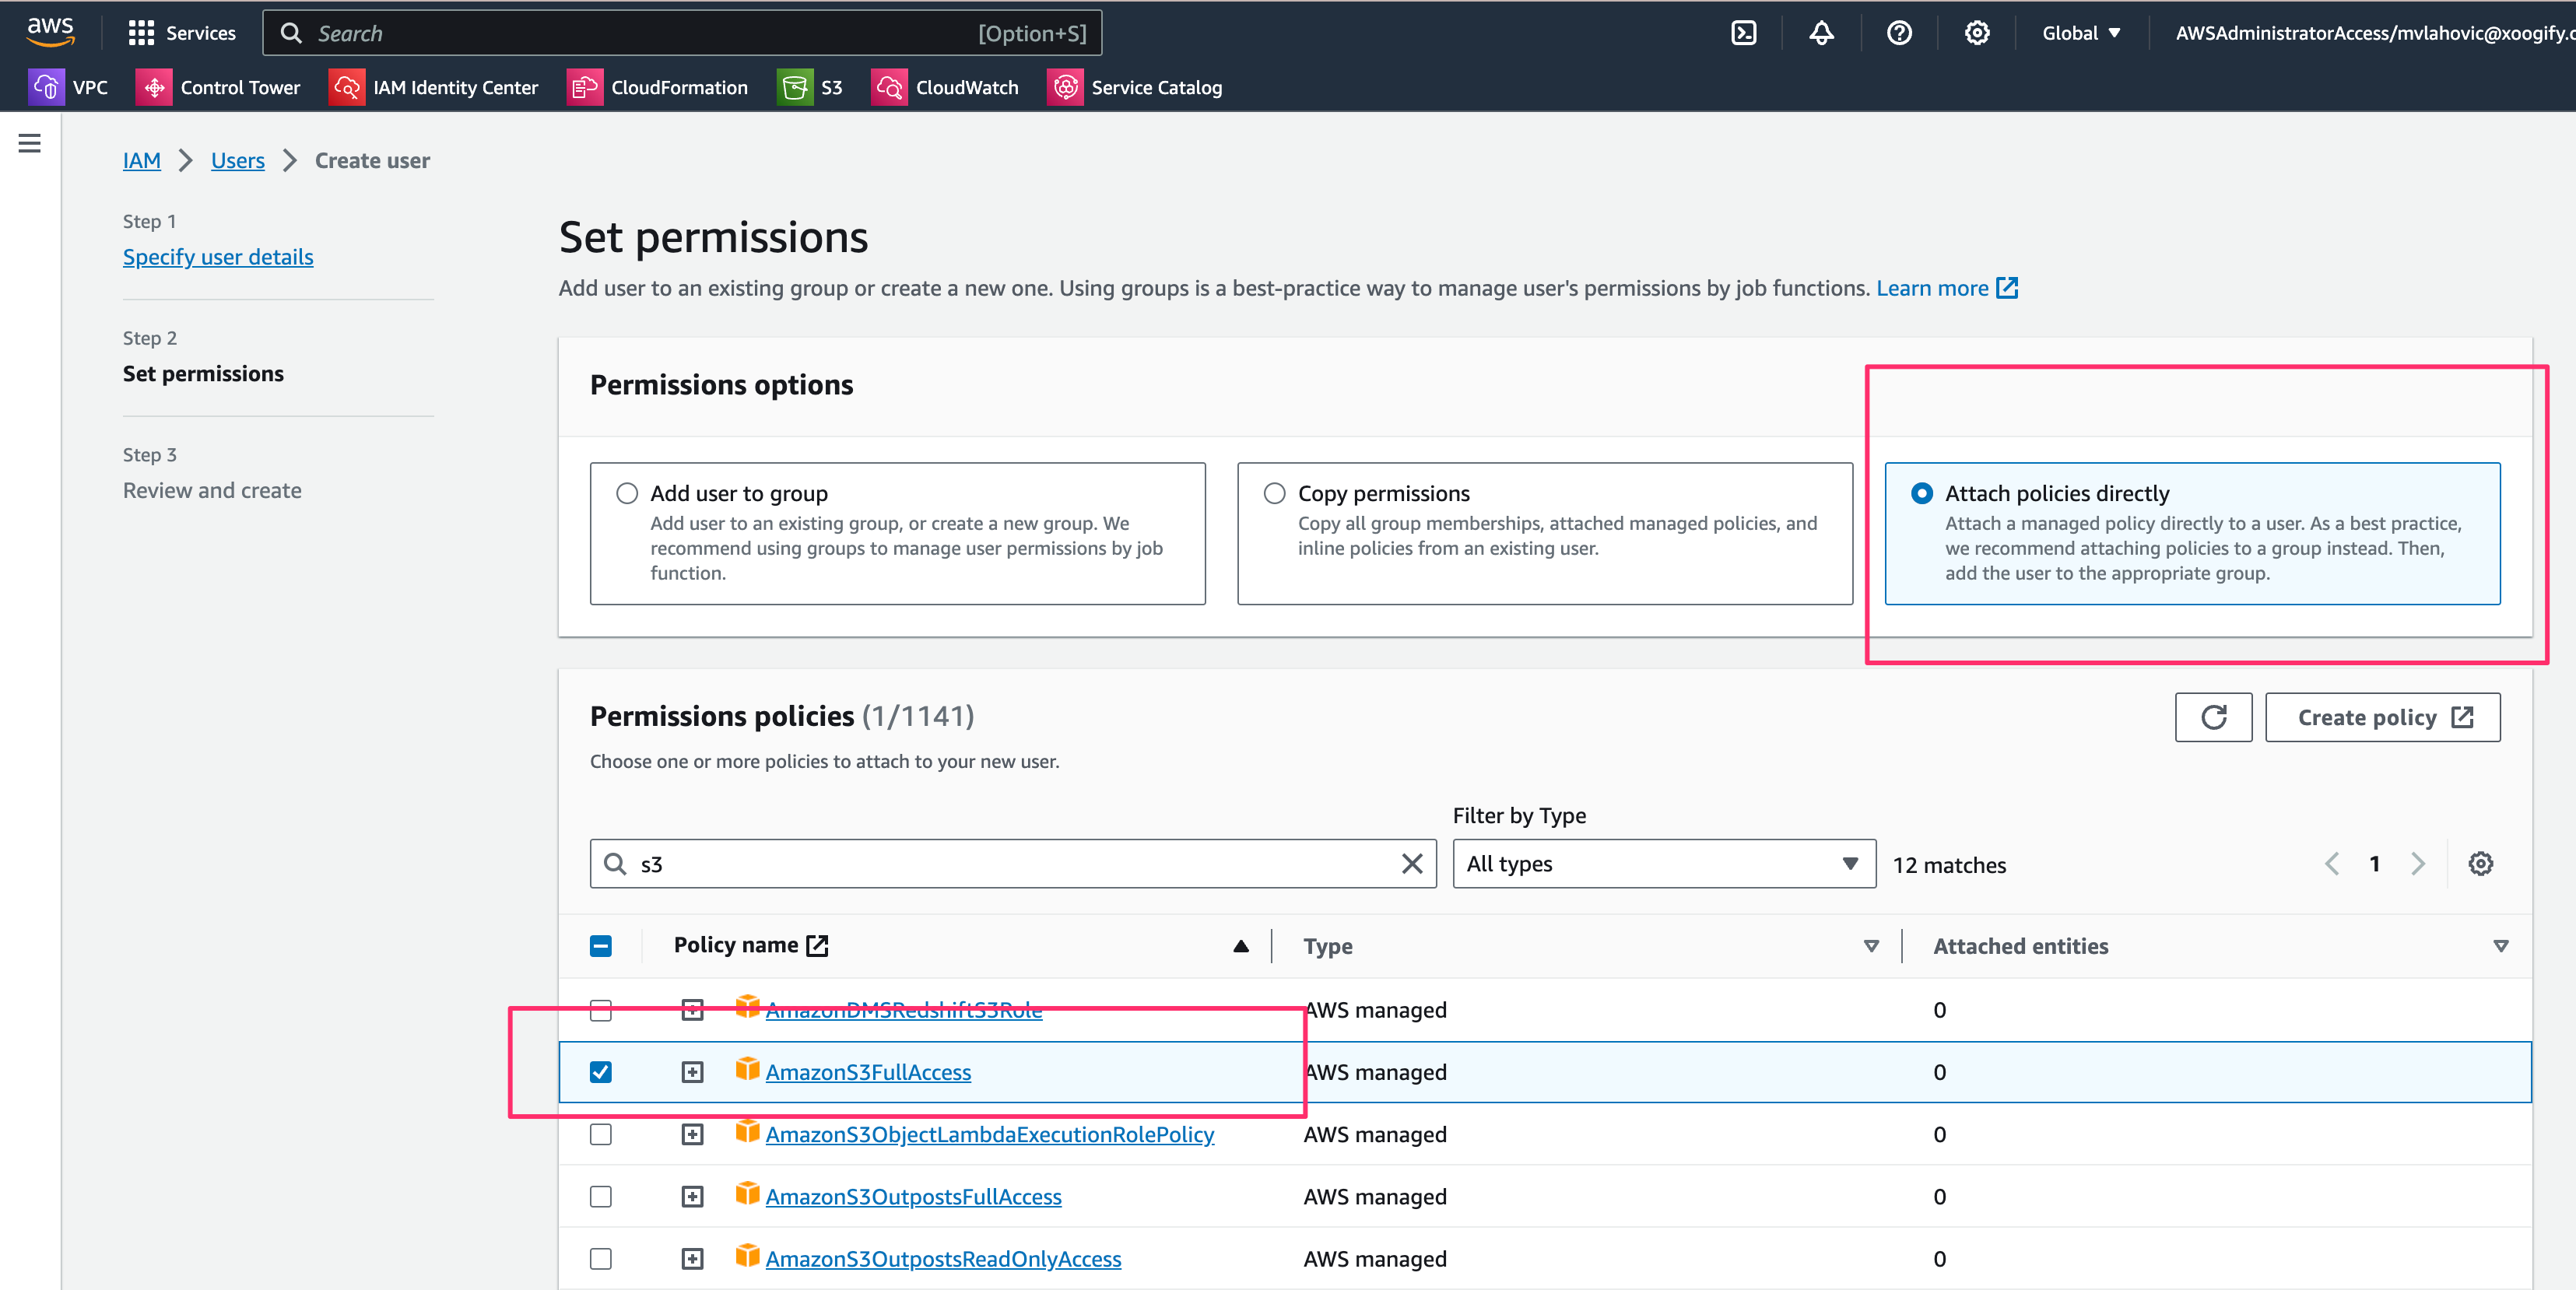
- Assign the user AmazonS3FullAccess Policy
- Review and
Create user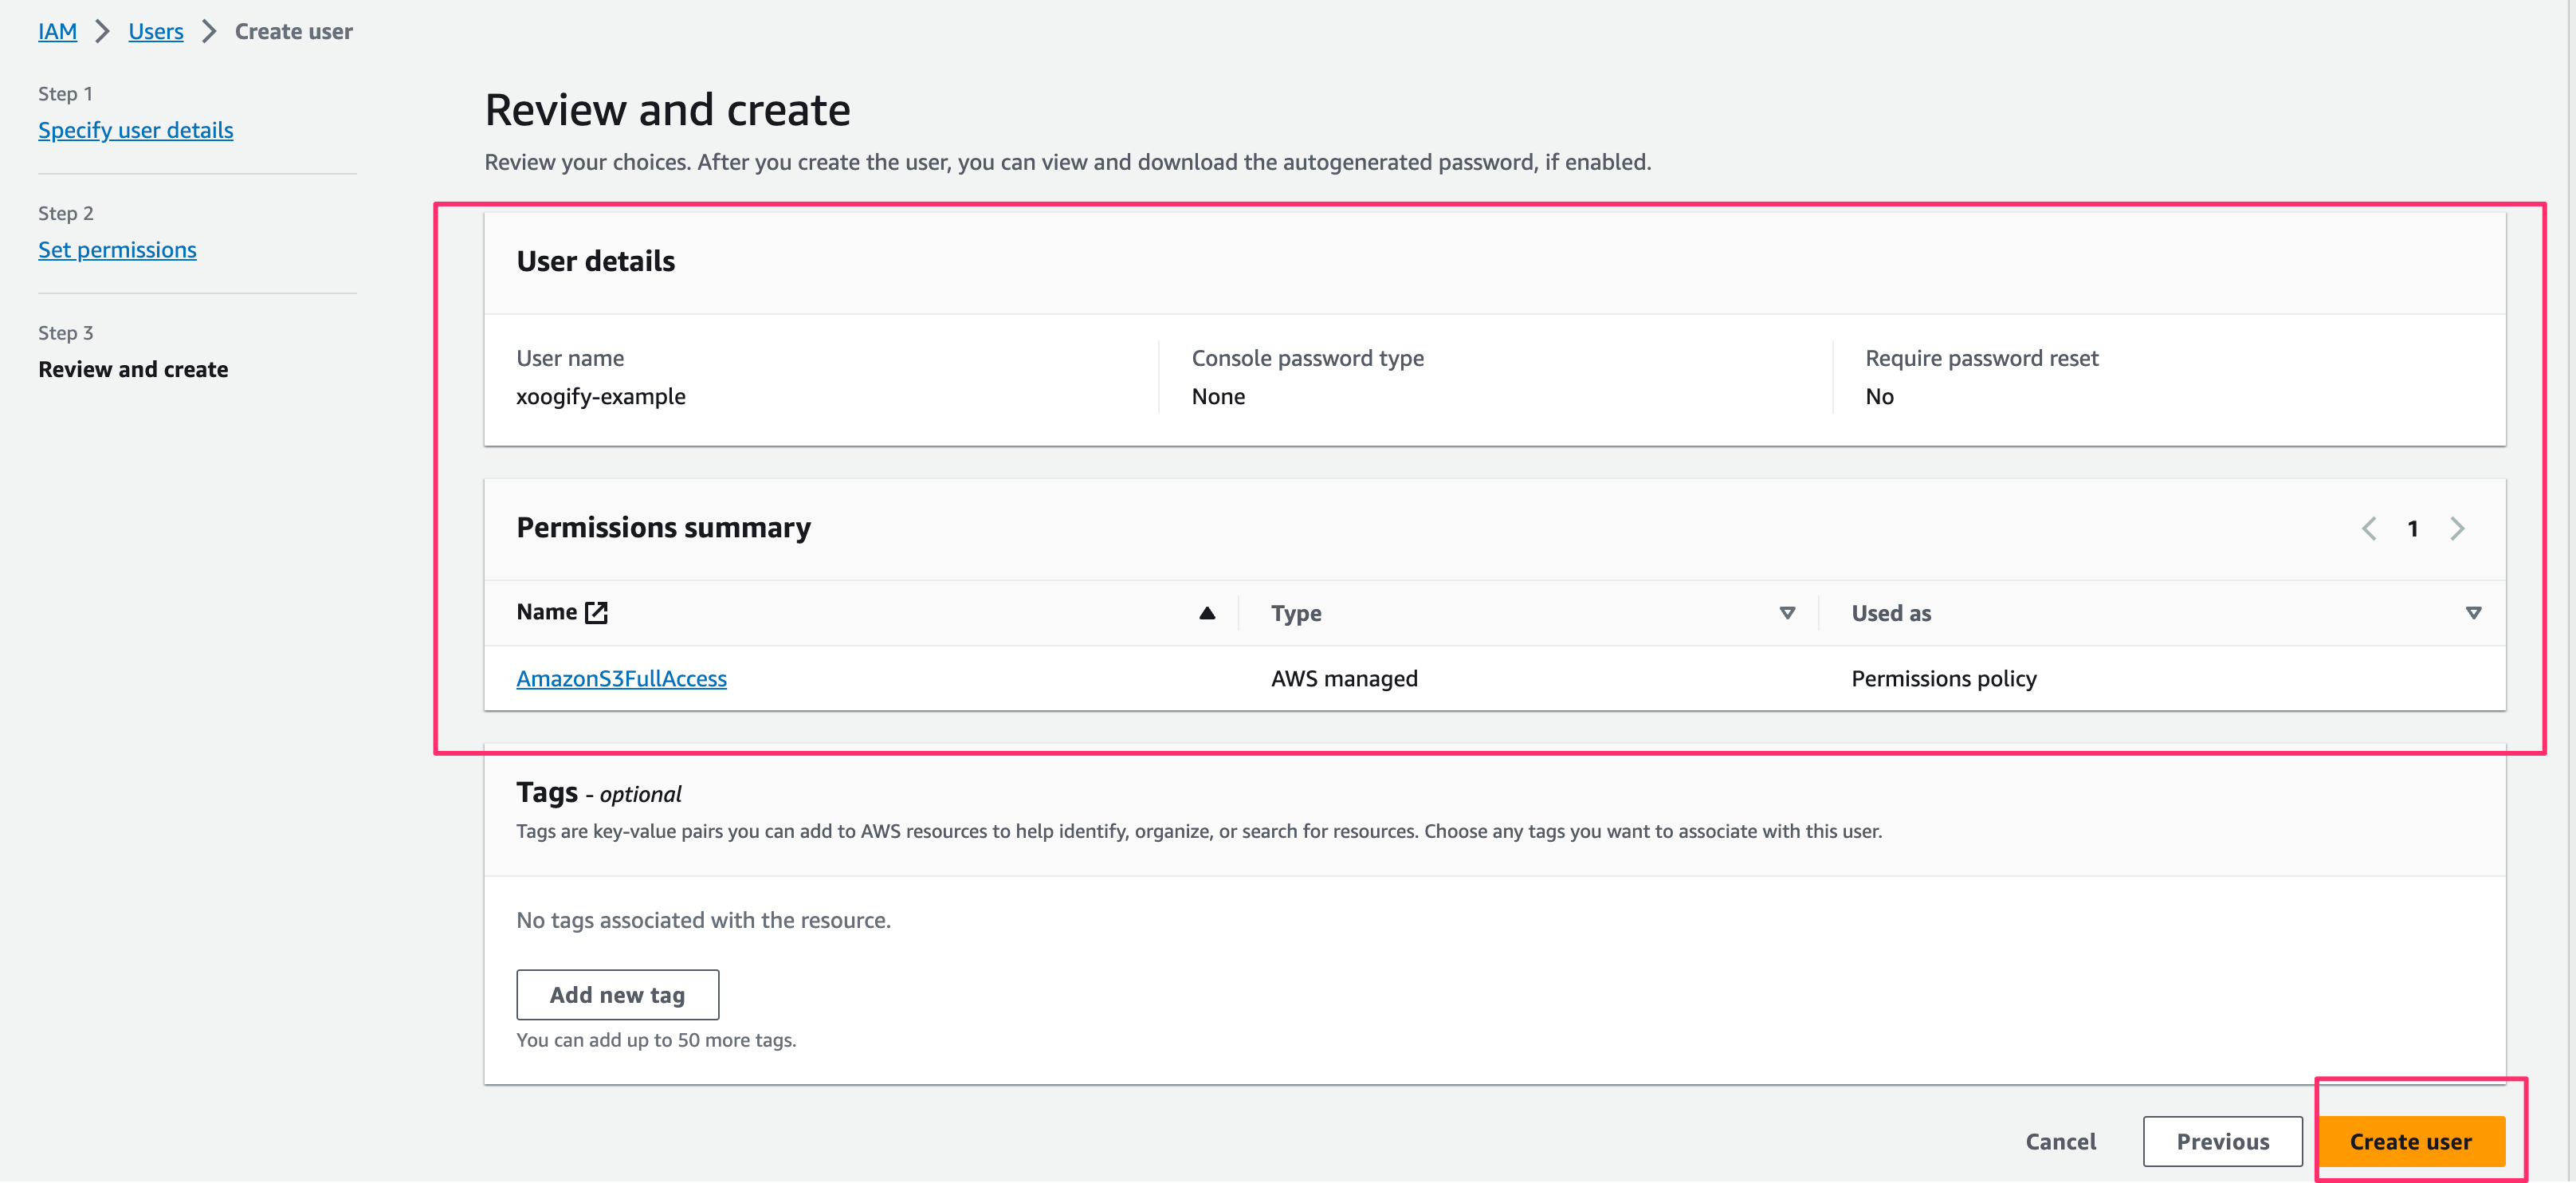
- Go to the new user and create access key.
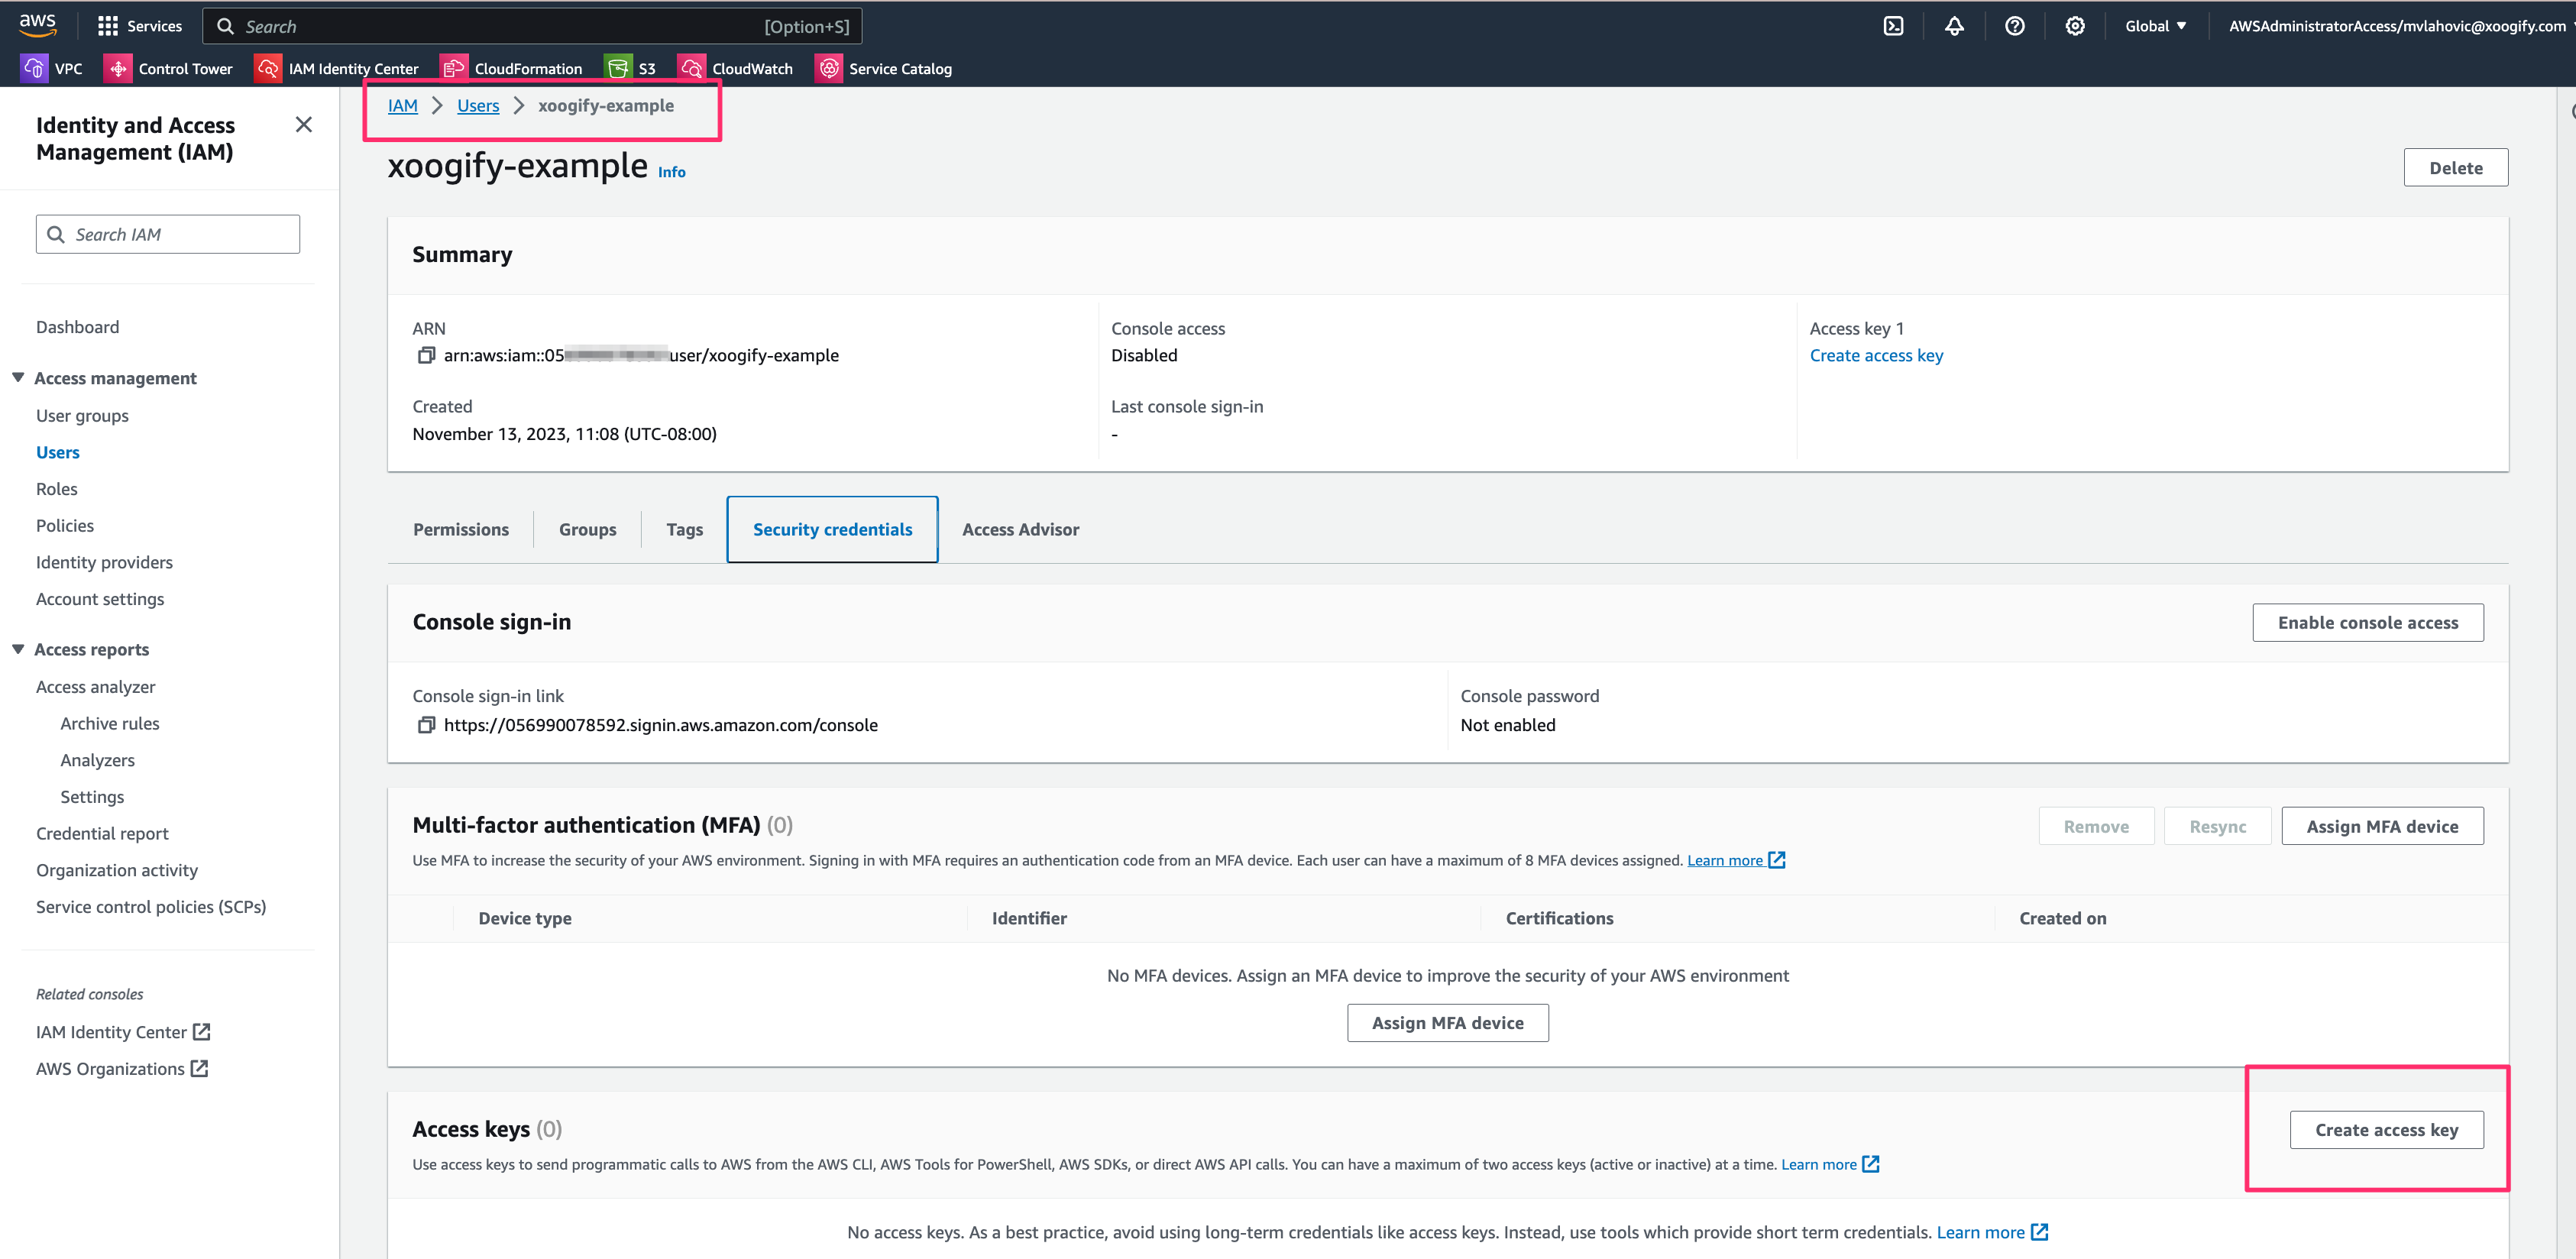
- Select
Third Party Servicein the list and ignore the warning (make sure to checkmarkI understand the above recommendation and want to proceed to create an access key.) - Press
Next - Press
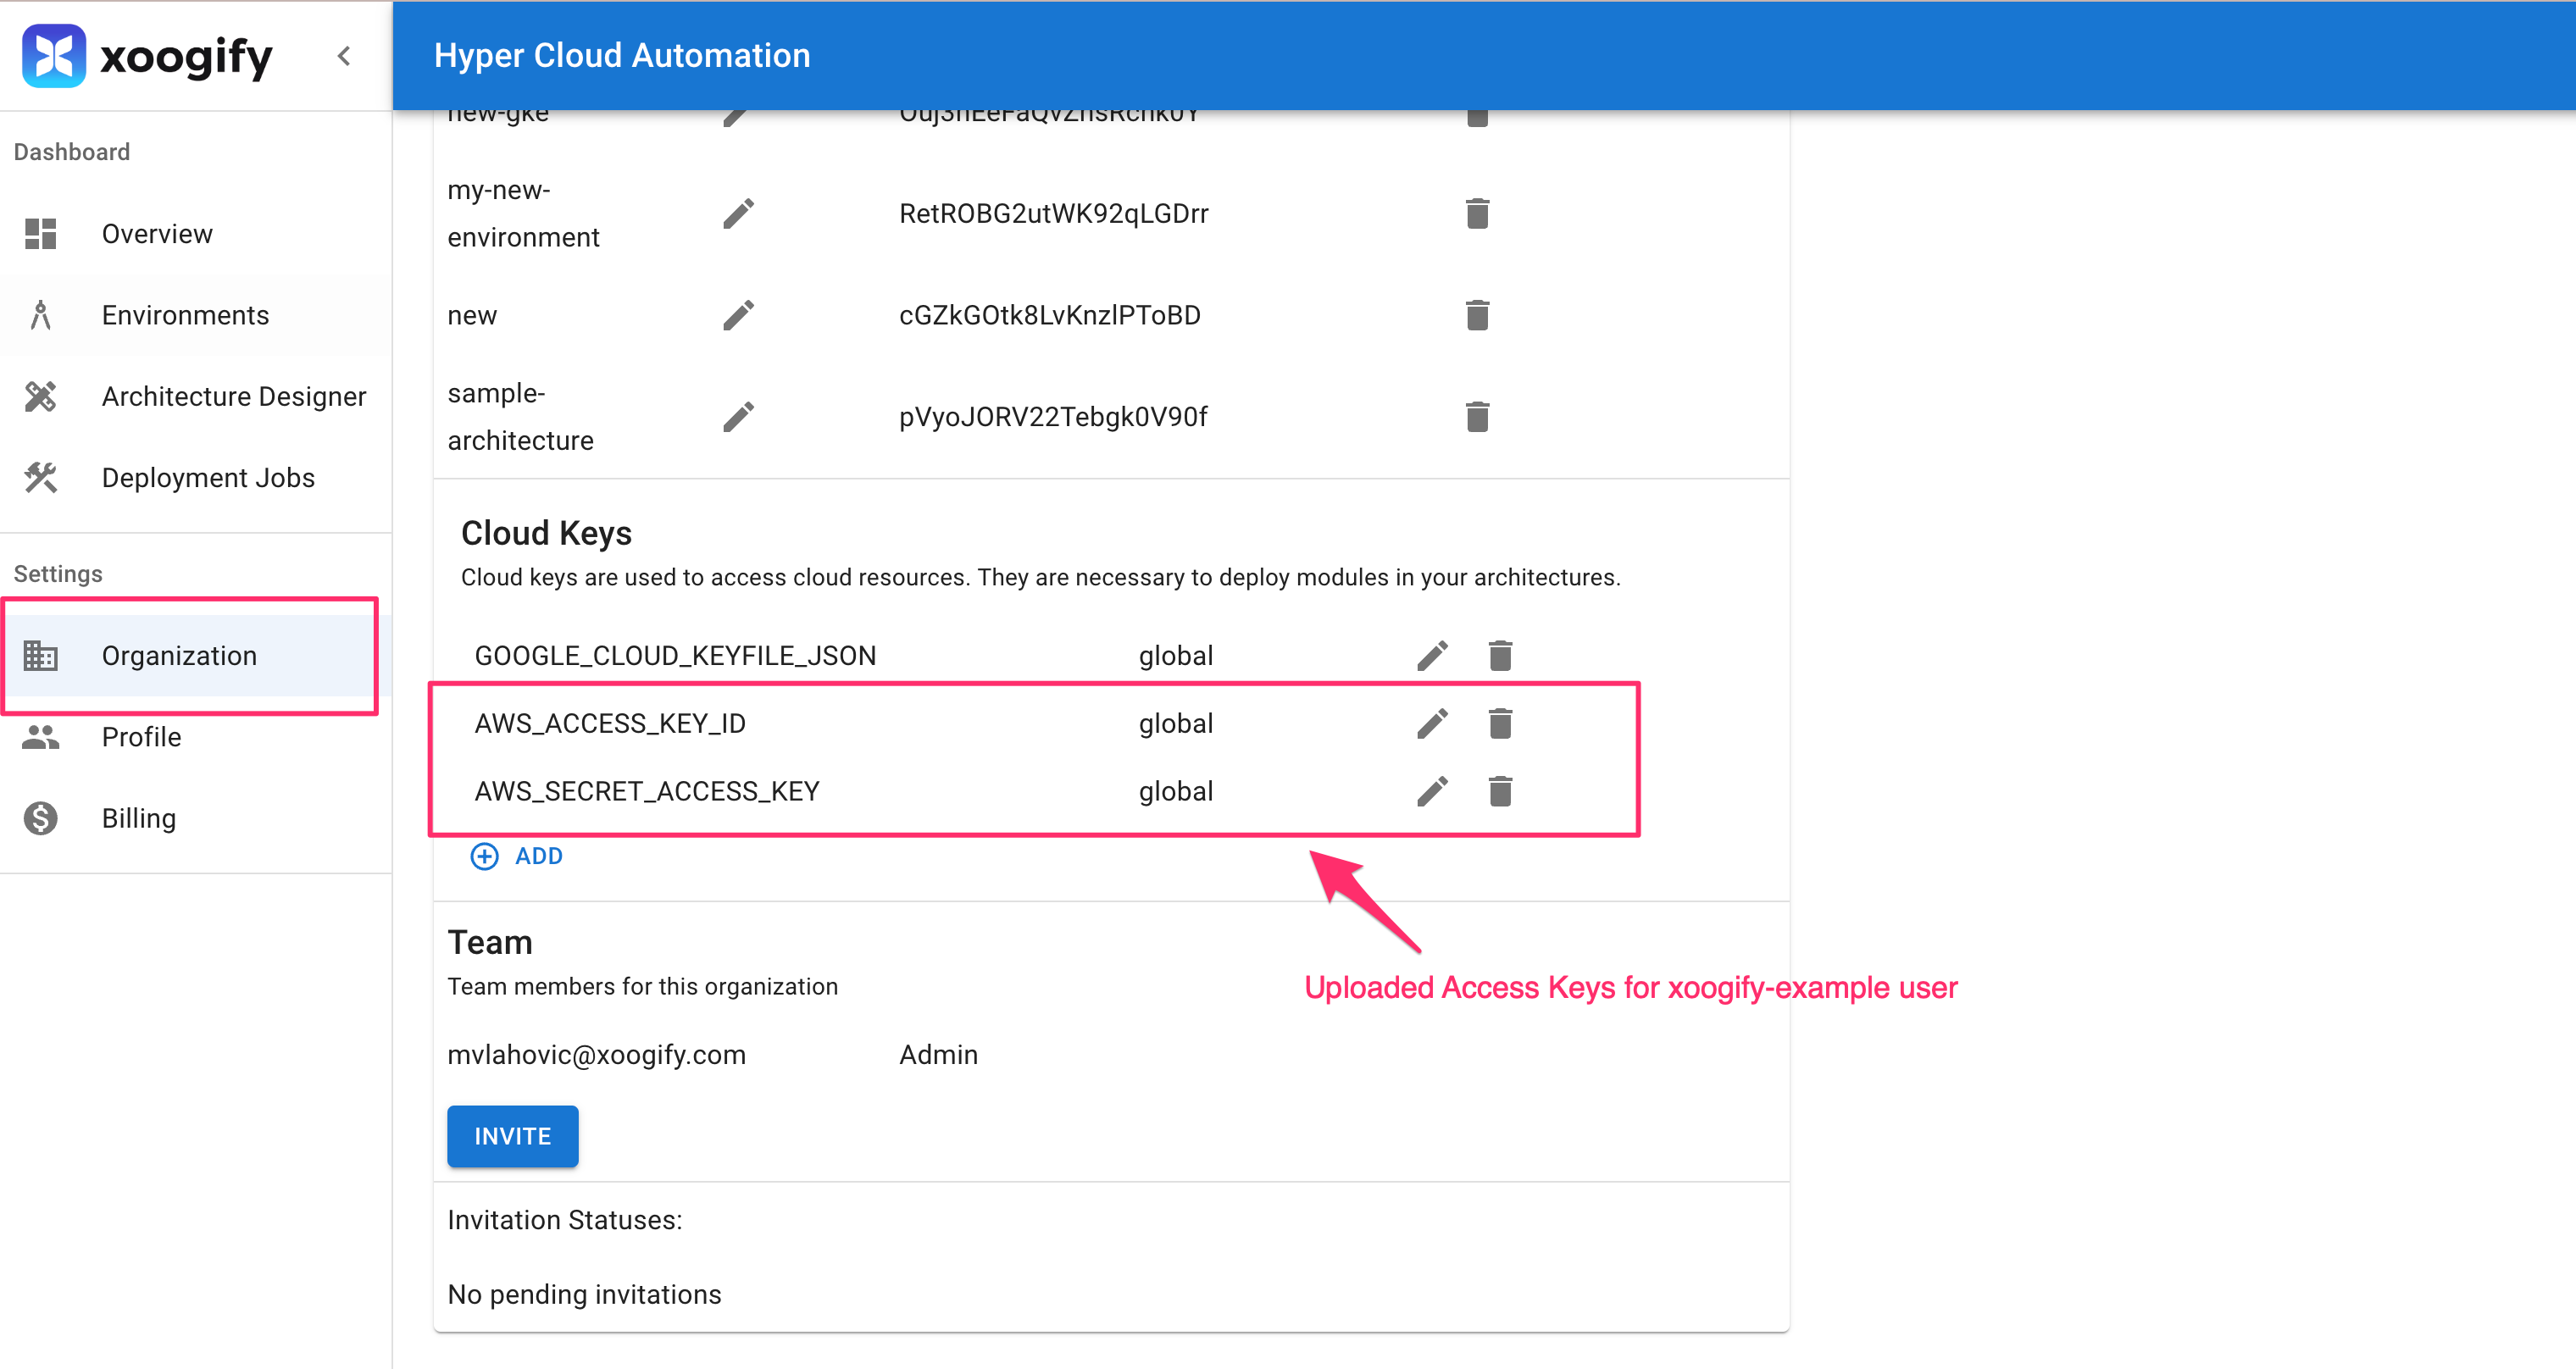
Create Access Key. Note down the values forAccess KeyandSecret Access Key - In the Hyper Cloud Automation click on Organization in the left hand navigation menu.
- Scroll to the Cloud Keys section.
- Press on
+Addbutton.- For
Cloud KeychooseAWS_ACCESS_KEY_ID. - Paste the value of the
AWS_ACCESS_KEY_IDfrom step 9 - For
Environmentchoose global. - Press
Savebutton - Repeat the above steps for
AWS_SECRET_ACCESS_KEY
- For
- You should have something like this
Create environment
In this example we will create a simple environment which consist of a module that deploys an S3 bucket.
- In the left naviation menu select
Environments - Click on
Add Environment - Name your environment
example-s3-environment - Press
Add - Select
EXAMPLE-S3-ENVIRONMENTin the tabs - Press on the
+button in theRoot of the Environment - Select
AWS AccountData SourcetipPress
Expand Environmentbutton to expand/collapse the tree - In the
AWS Accountnode press on the button and fill in the followingName- name of your AWS Account (required)Account ID- ID of your AWS Account (required)- Press
Save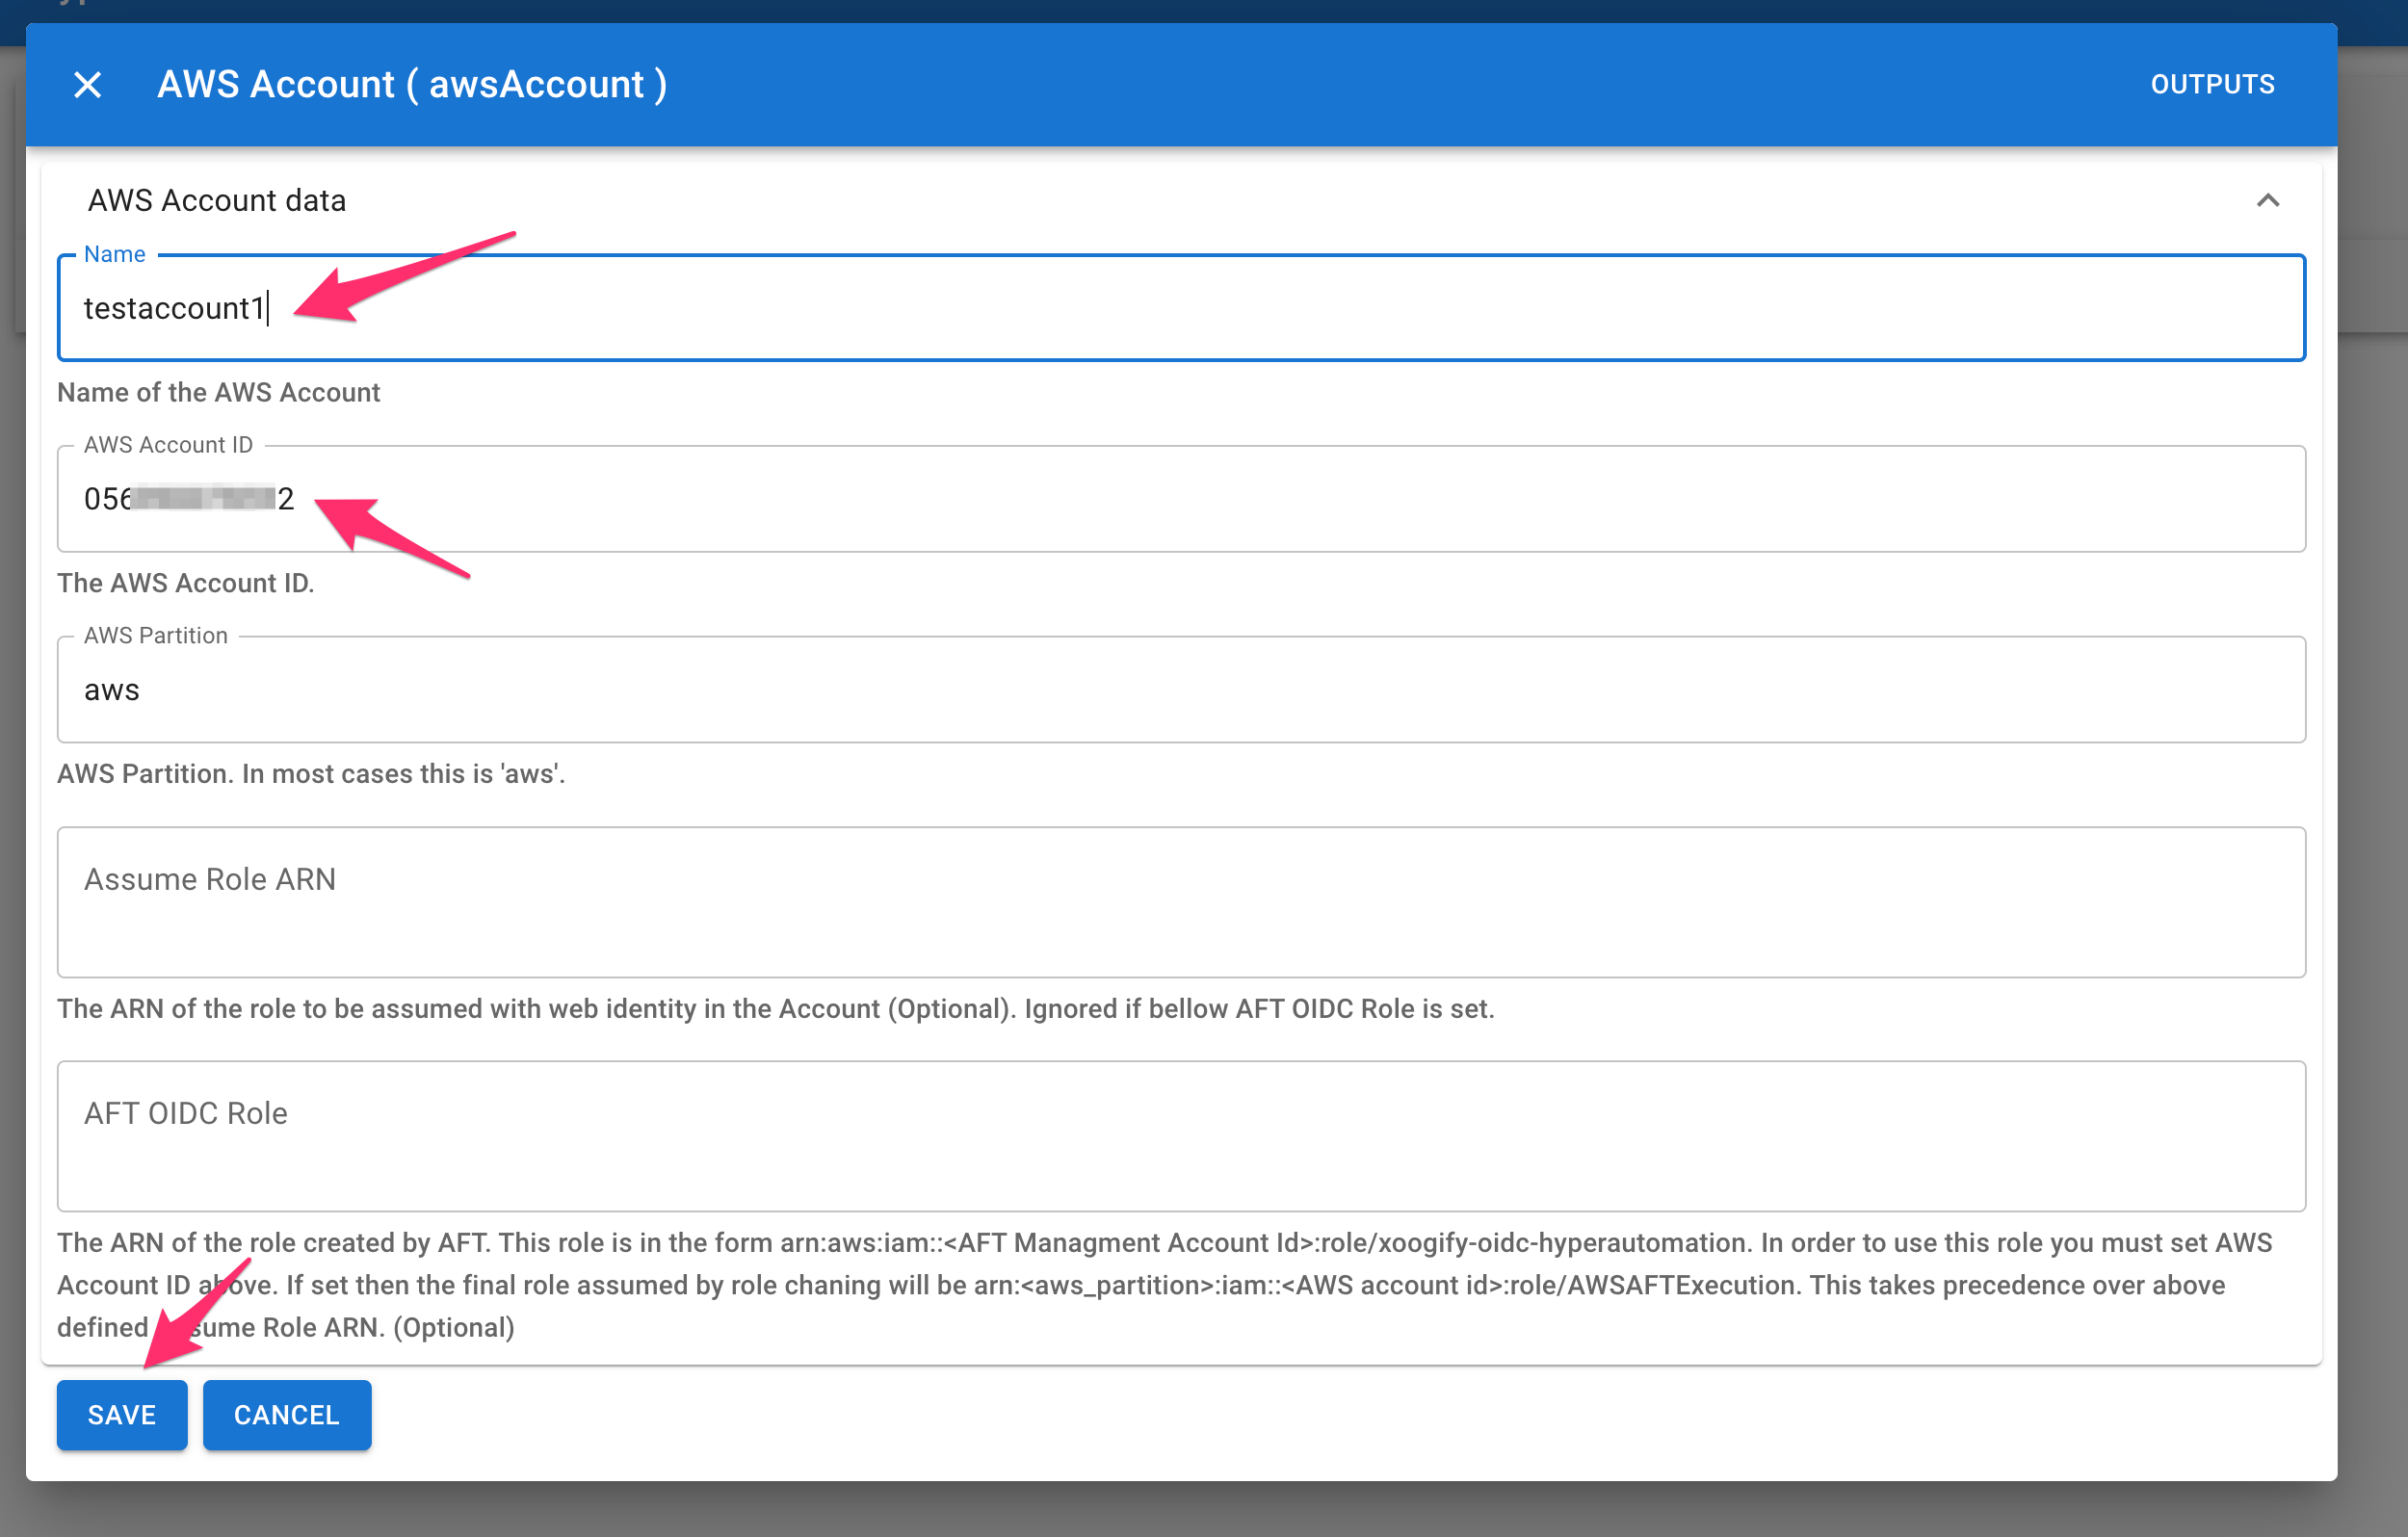
- On
AWS Accountnode press and selectAWS RegionData Source - Click on button and set the region to
us-west-2and pressSave - On
AWS Regionnode press and selectAWS S3 BucketModule - Click on button to enter the settings for the bucket
- You only need to set the
Bucket Name. (Example:my-xoogify-hyper-cloud-automation-bucket-57) - Scroll all the way down and press
Save
- You only need to set the
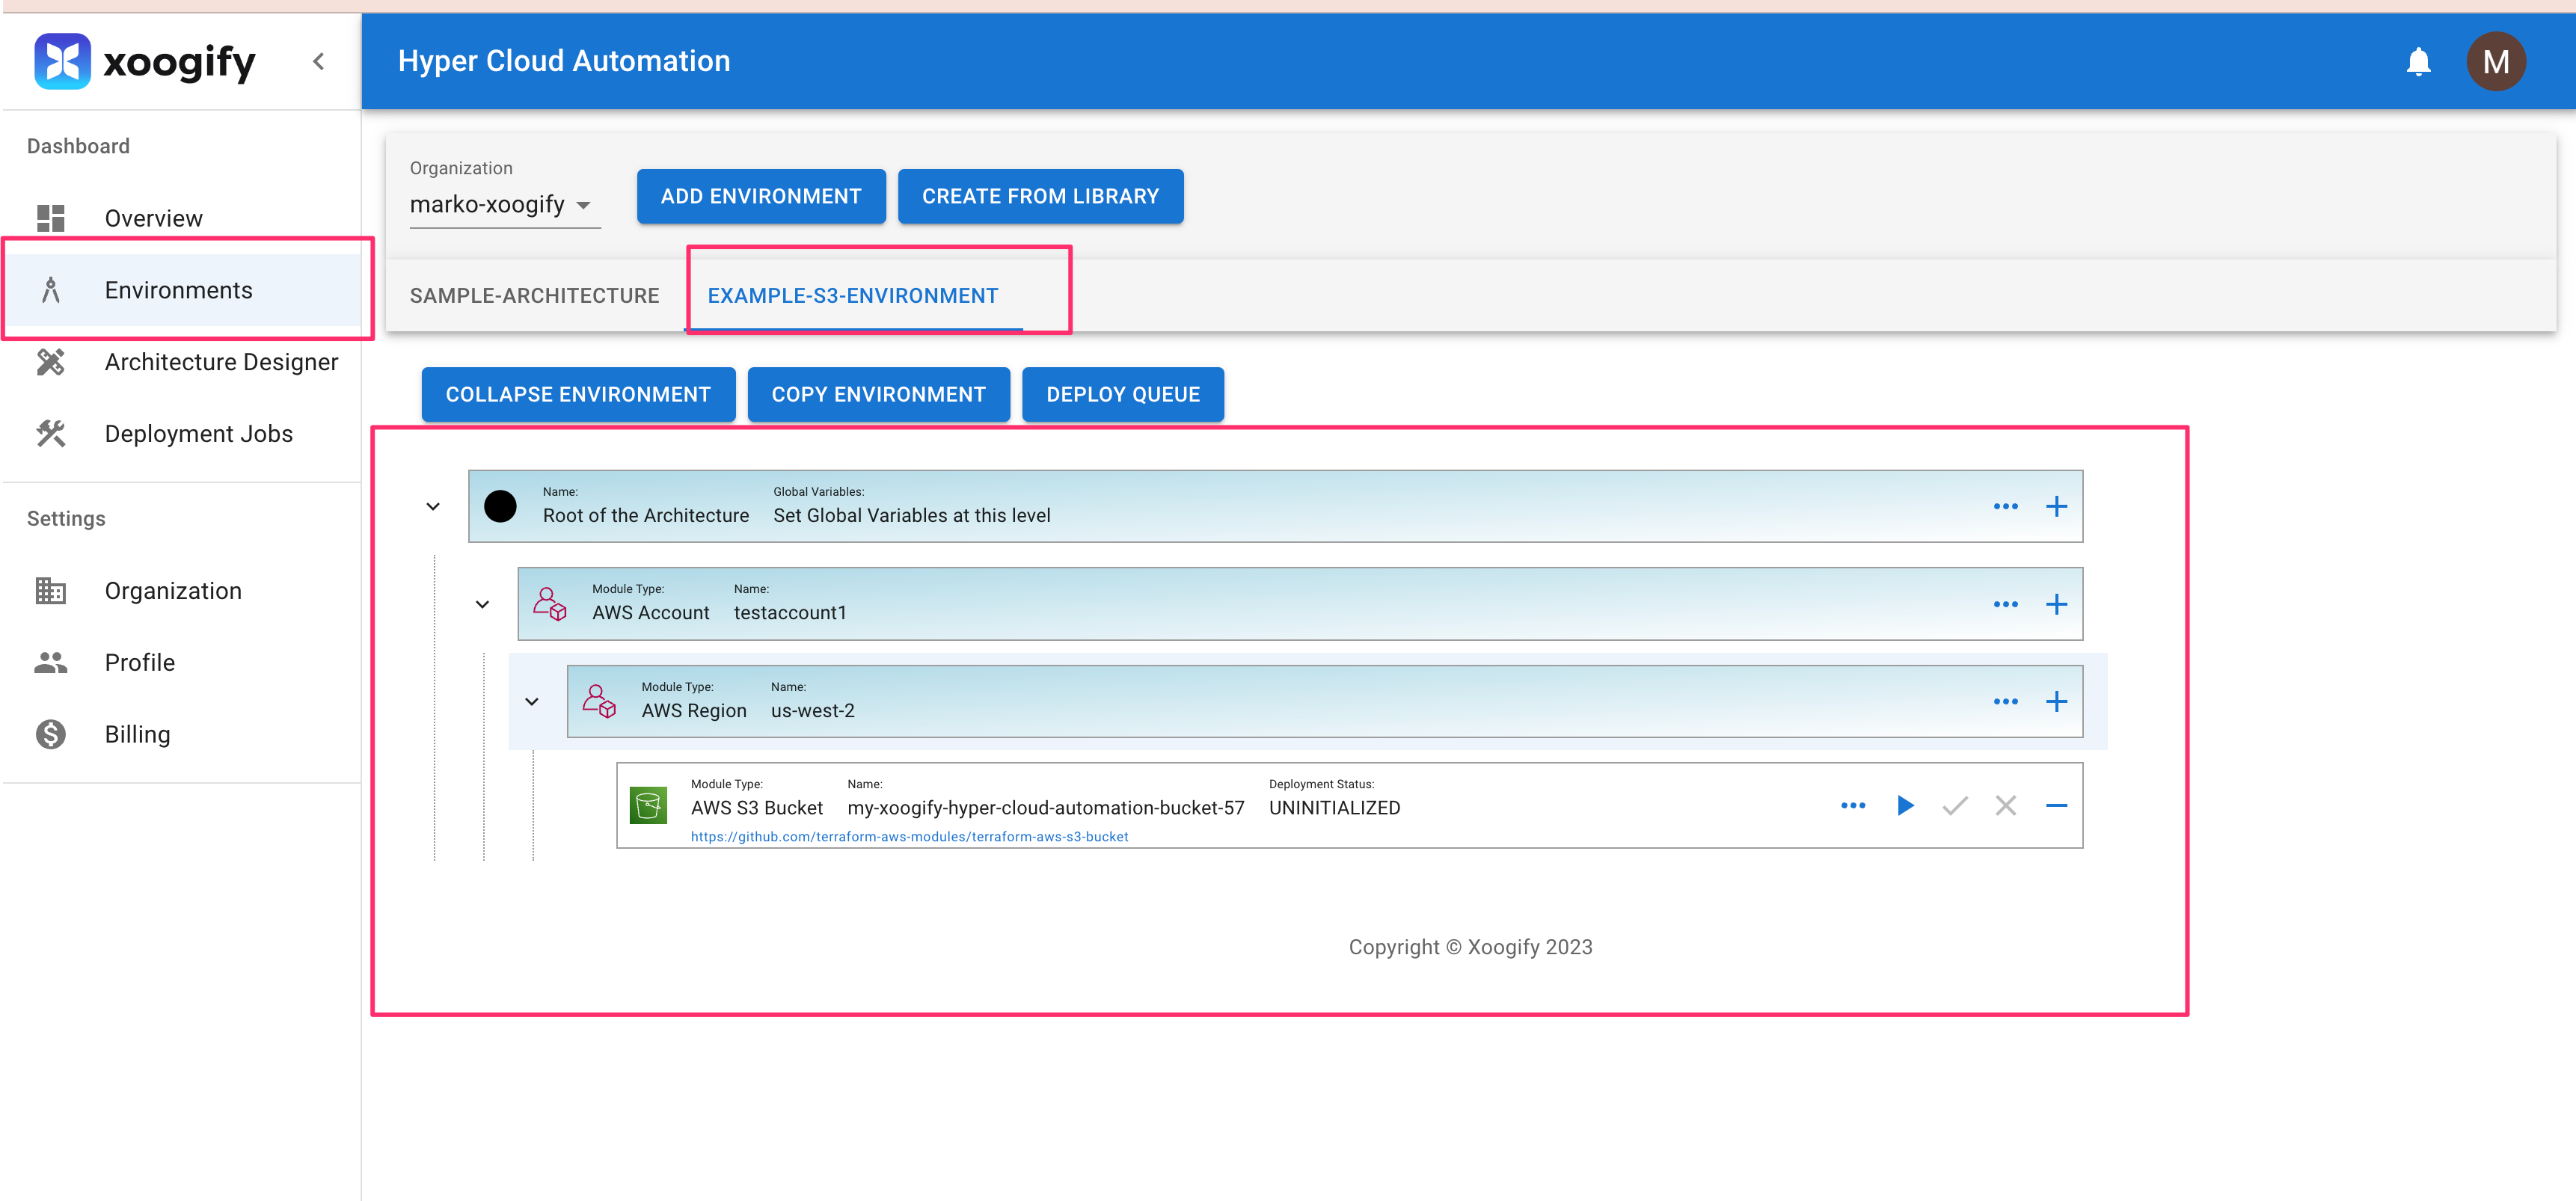
Your first simple environment should look something like this:
Deploy
Deployment process consists of running a plan action folowed by approval process and then running apply
- In your environment locate
AWS S3 Bucketmodule - Press on the in the module to start the
plan. Notice that theDeployment Statuswill change.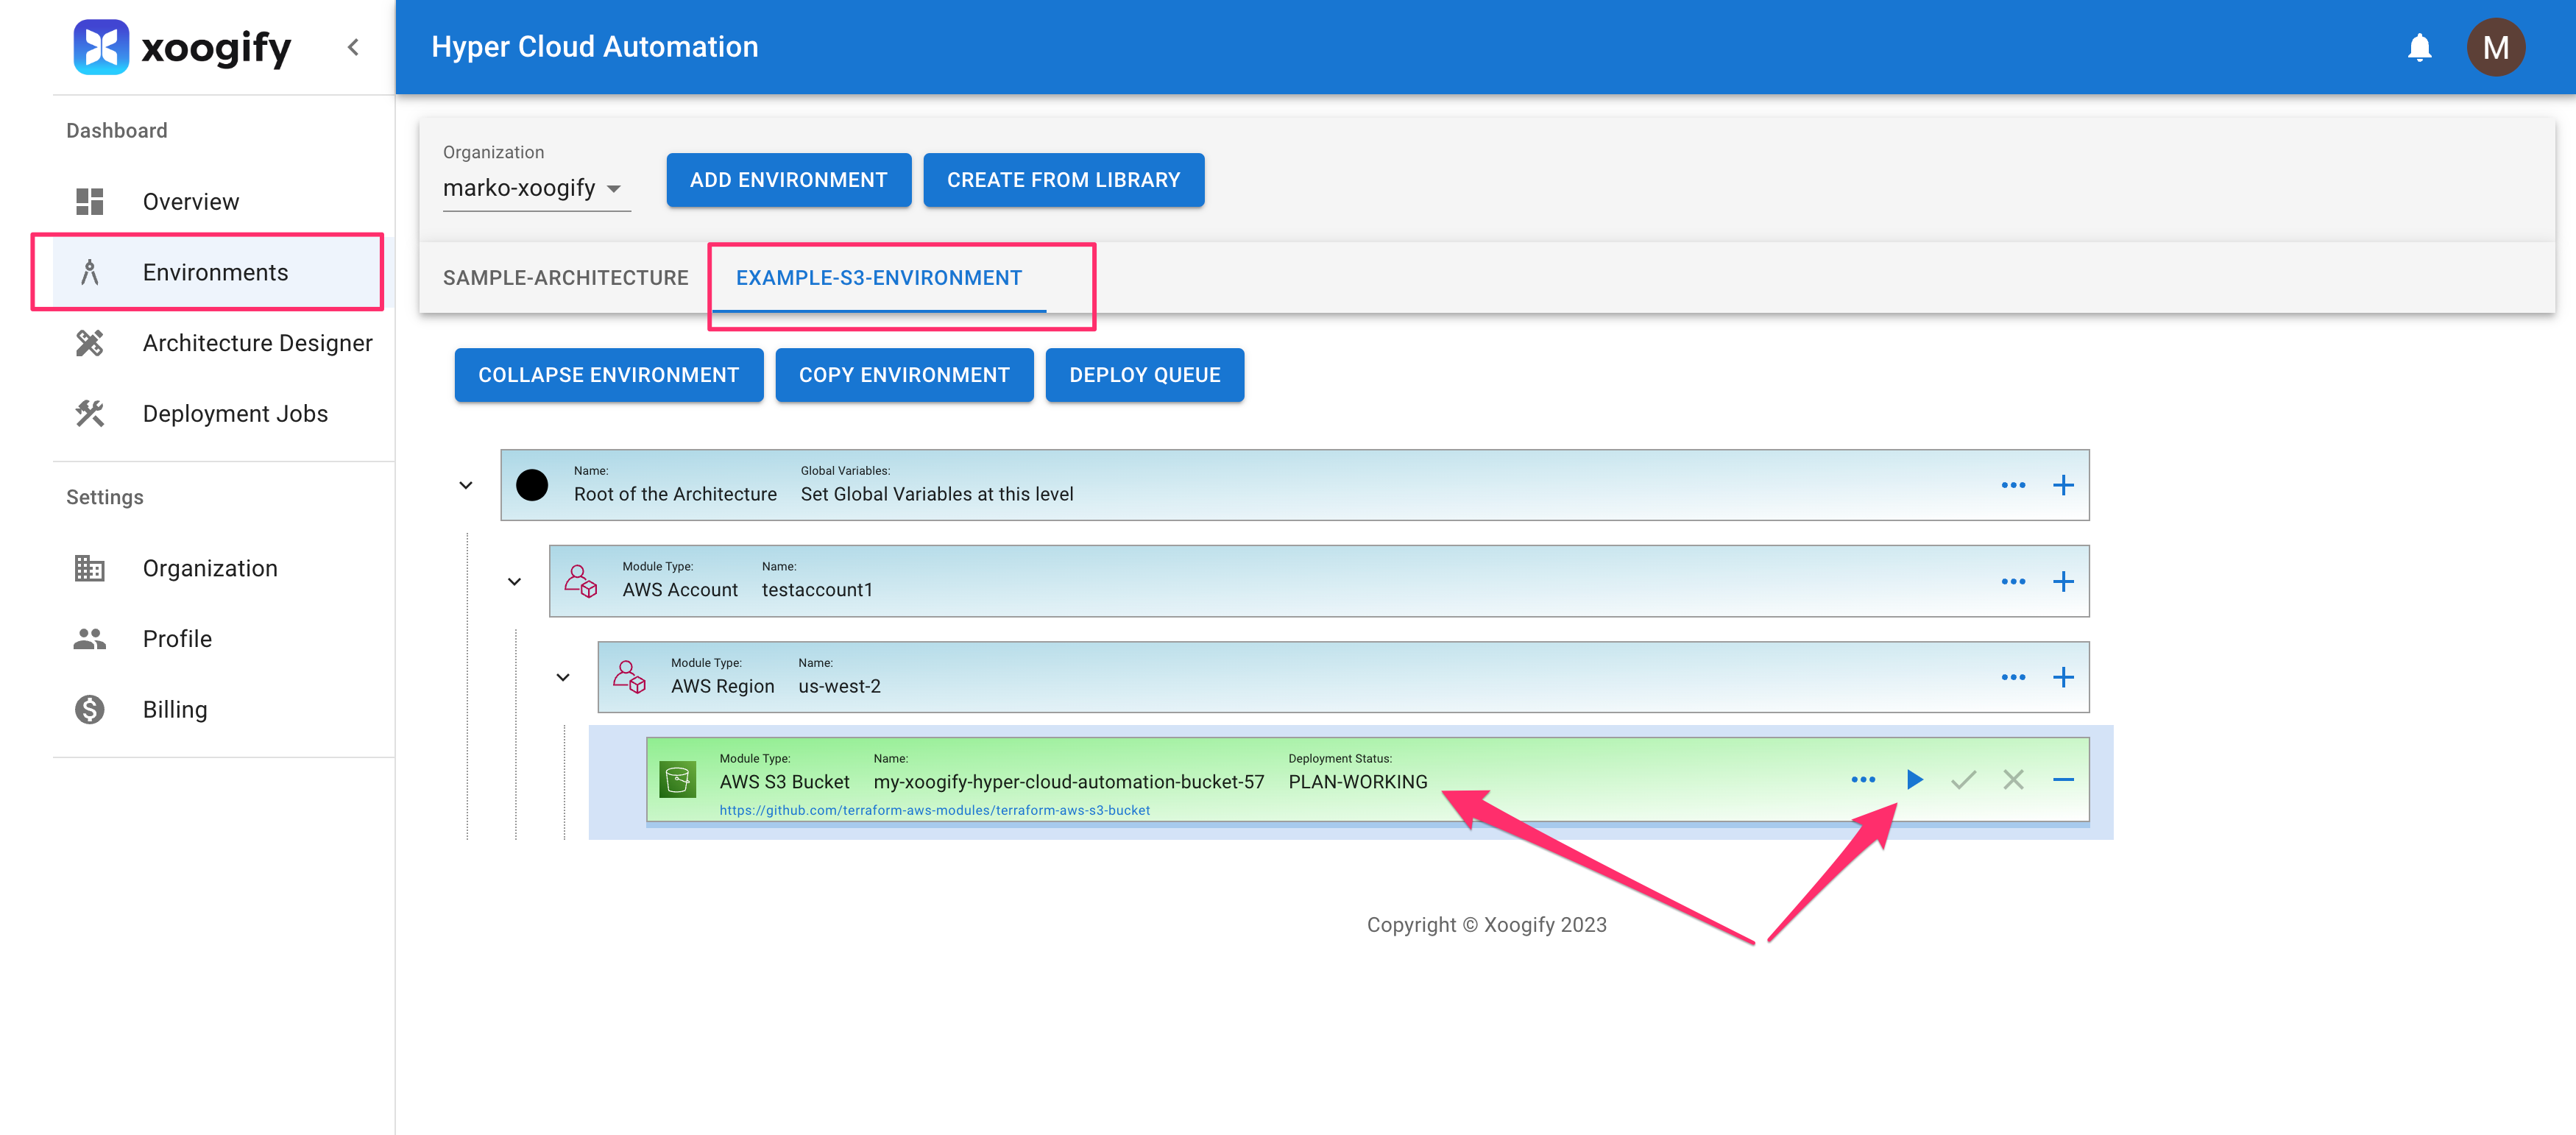
- Once the
Deployment Statusis changed toPLAN SUCCESSclick on button to pop up the deploymentPLAN - In the top right corner press
TERRAFORM-APPLYbutton - Wait for deployment to finish.
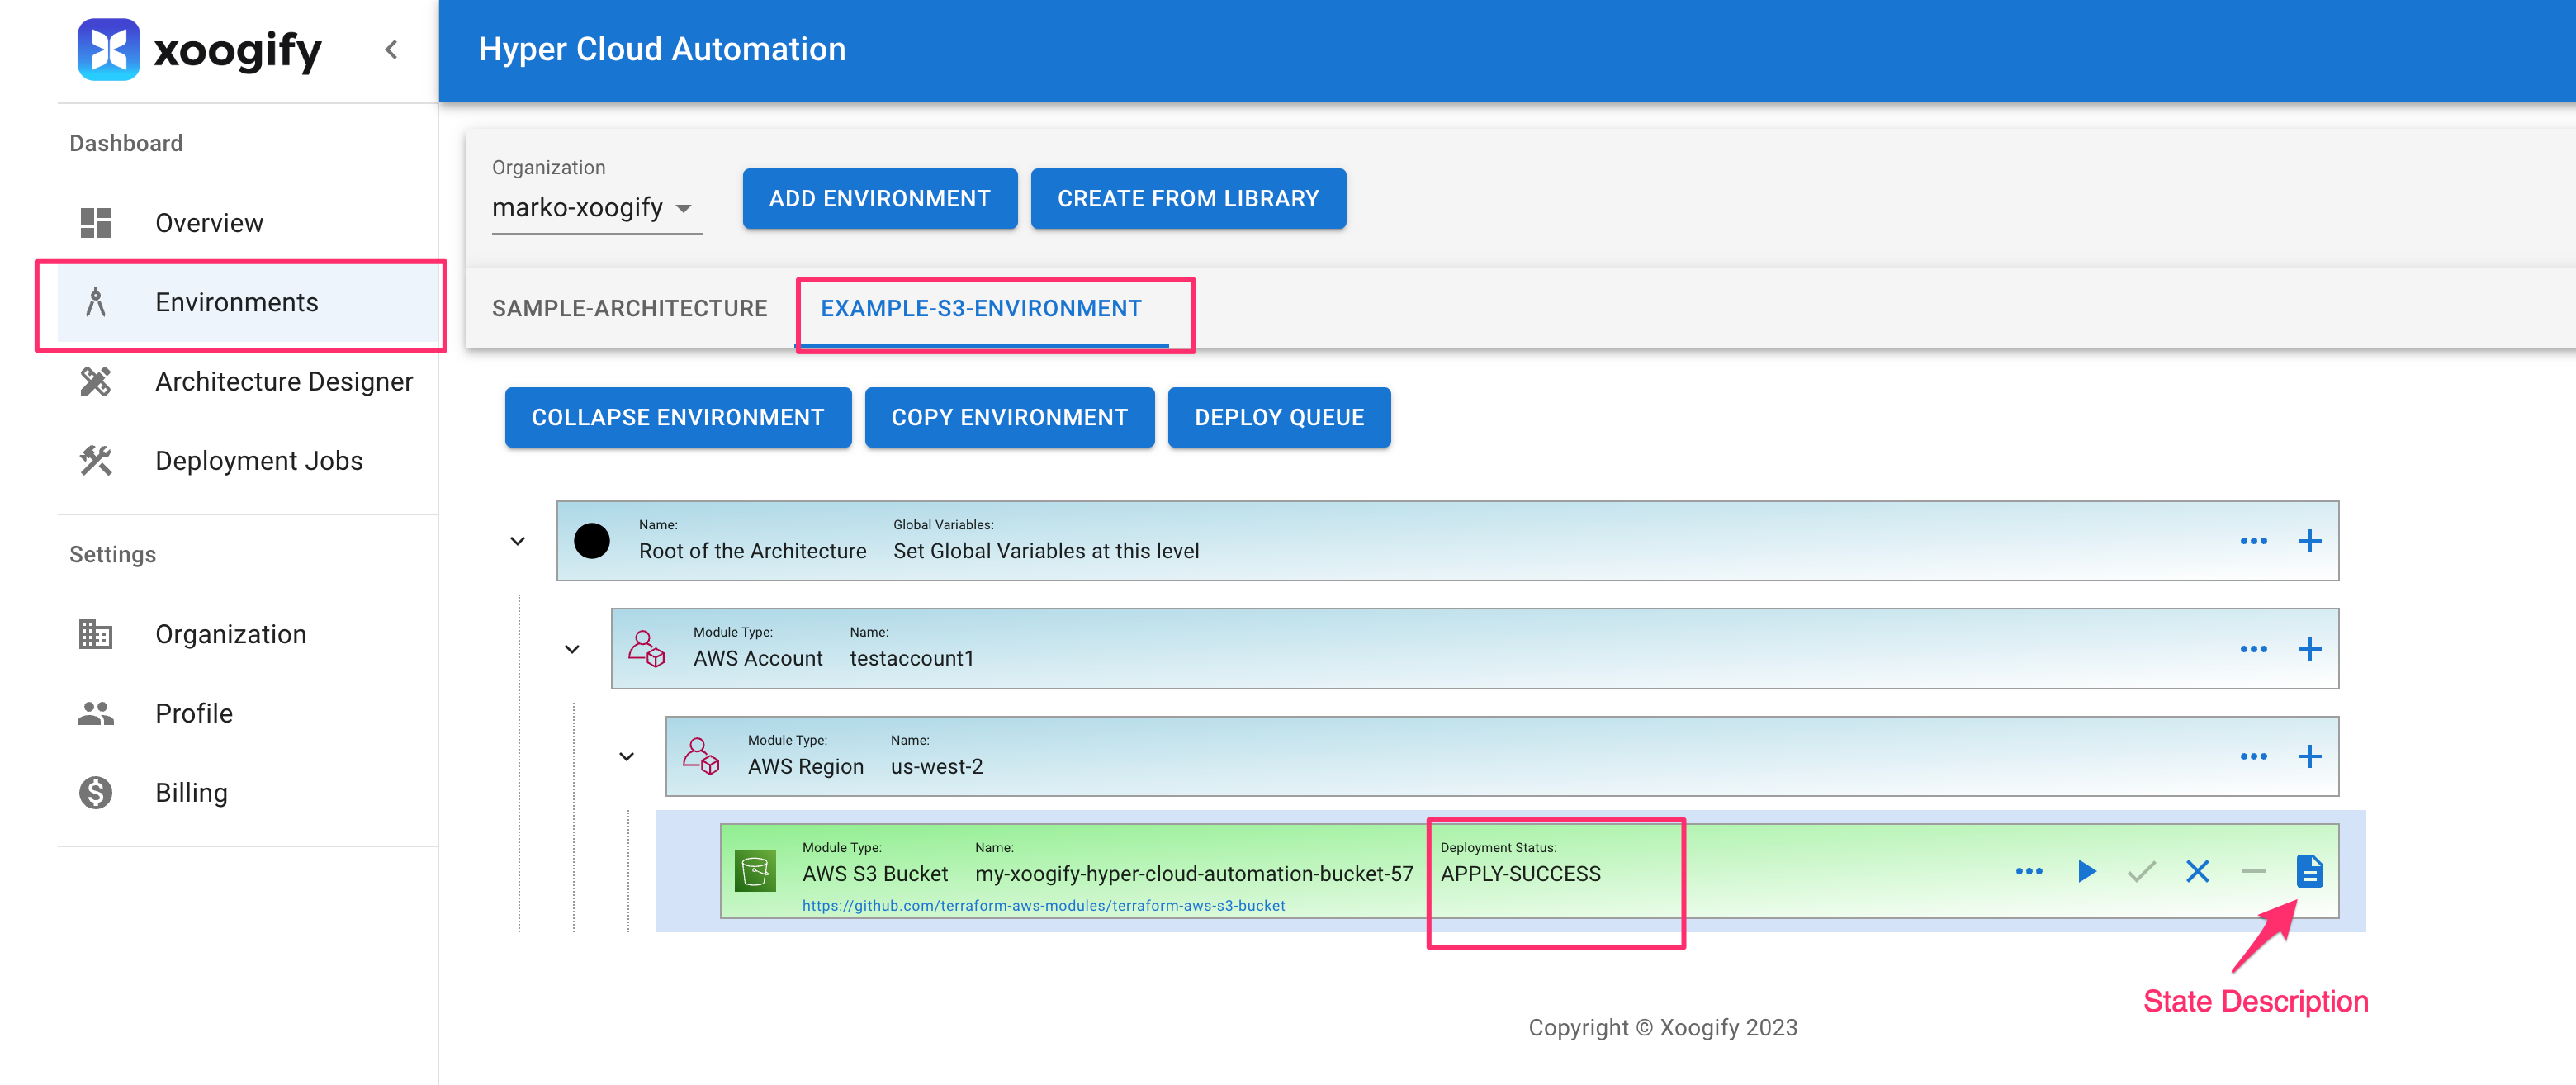
- You can review the state file as in the image above
- Go to your AWS Console
- Go to S3
- You will find the bucket that has been deployed
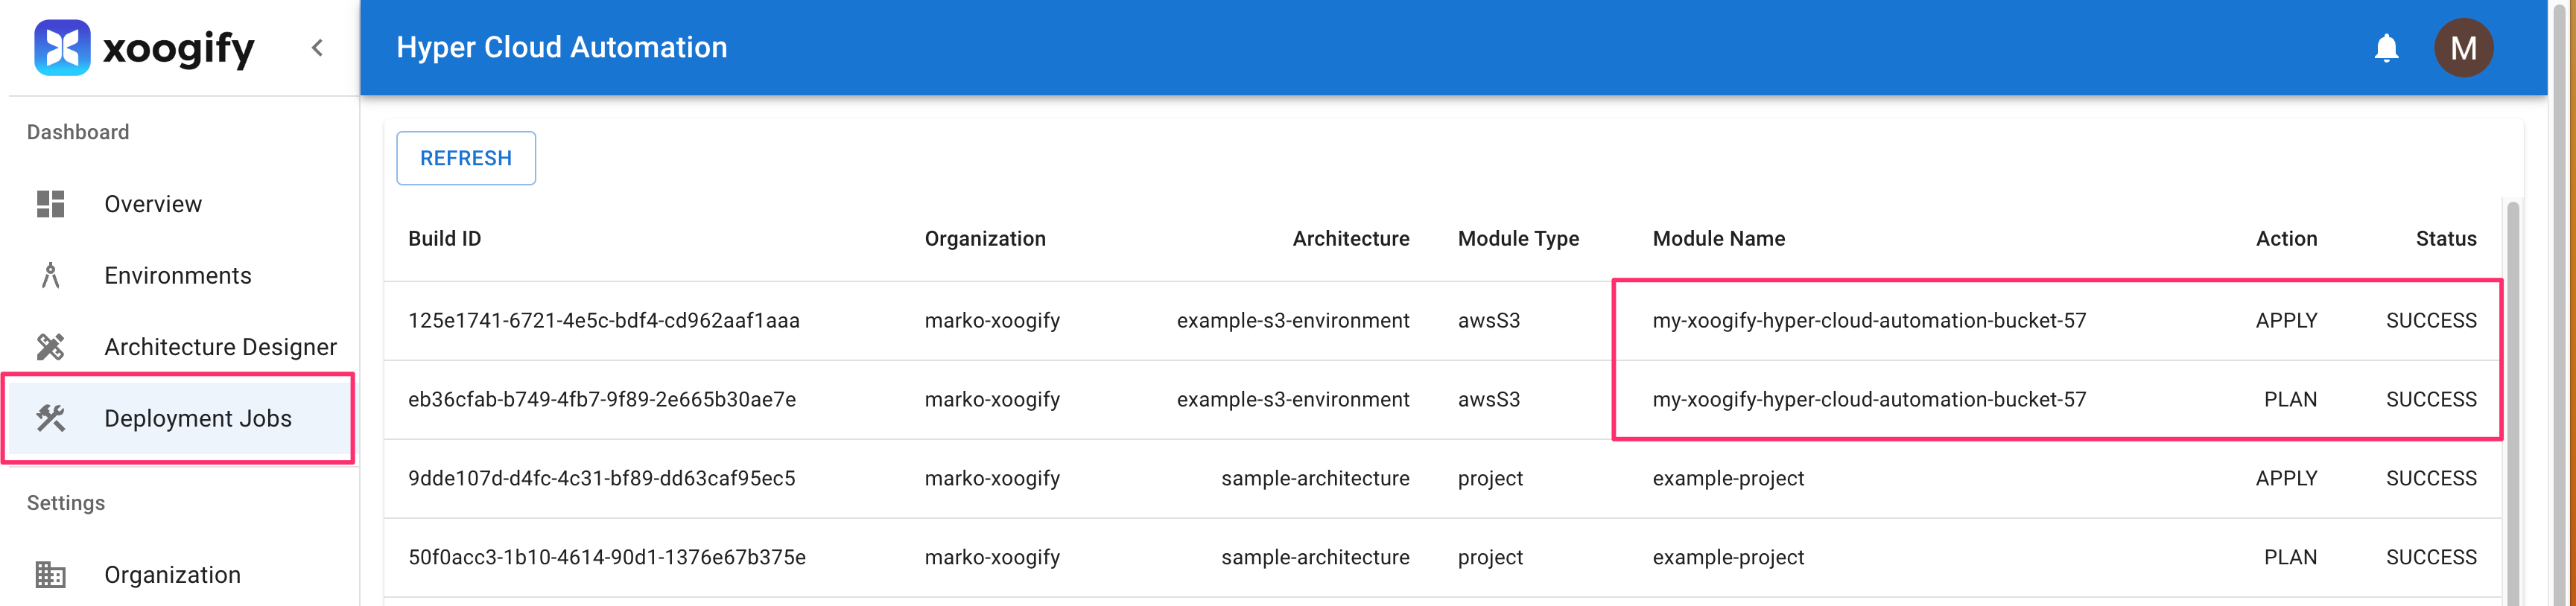
To review deployments log do:
- In the left navigation menu click on
Deployment Jobs - Click on the deployment job IDs to see the full logs
Destroy the bucket
- In the naviagion menu on the left select
Environments - In the tabs select
EXAMPLE-S3-ENVIRONMENT - Click on
Expand Environment - Click on button on the
AWS S3 Bucketmodule. - Confirm the destruction plan
- Wait for
Destroyto complete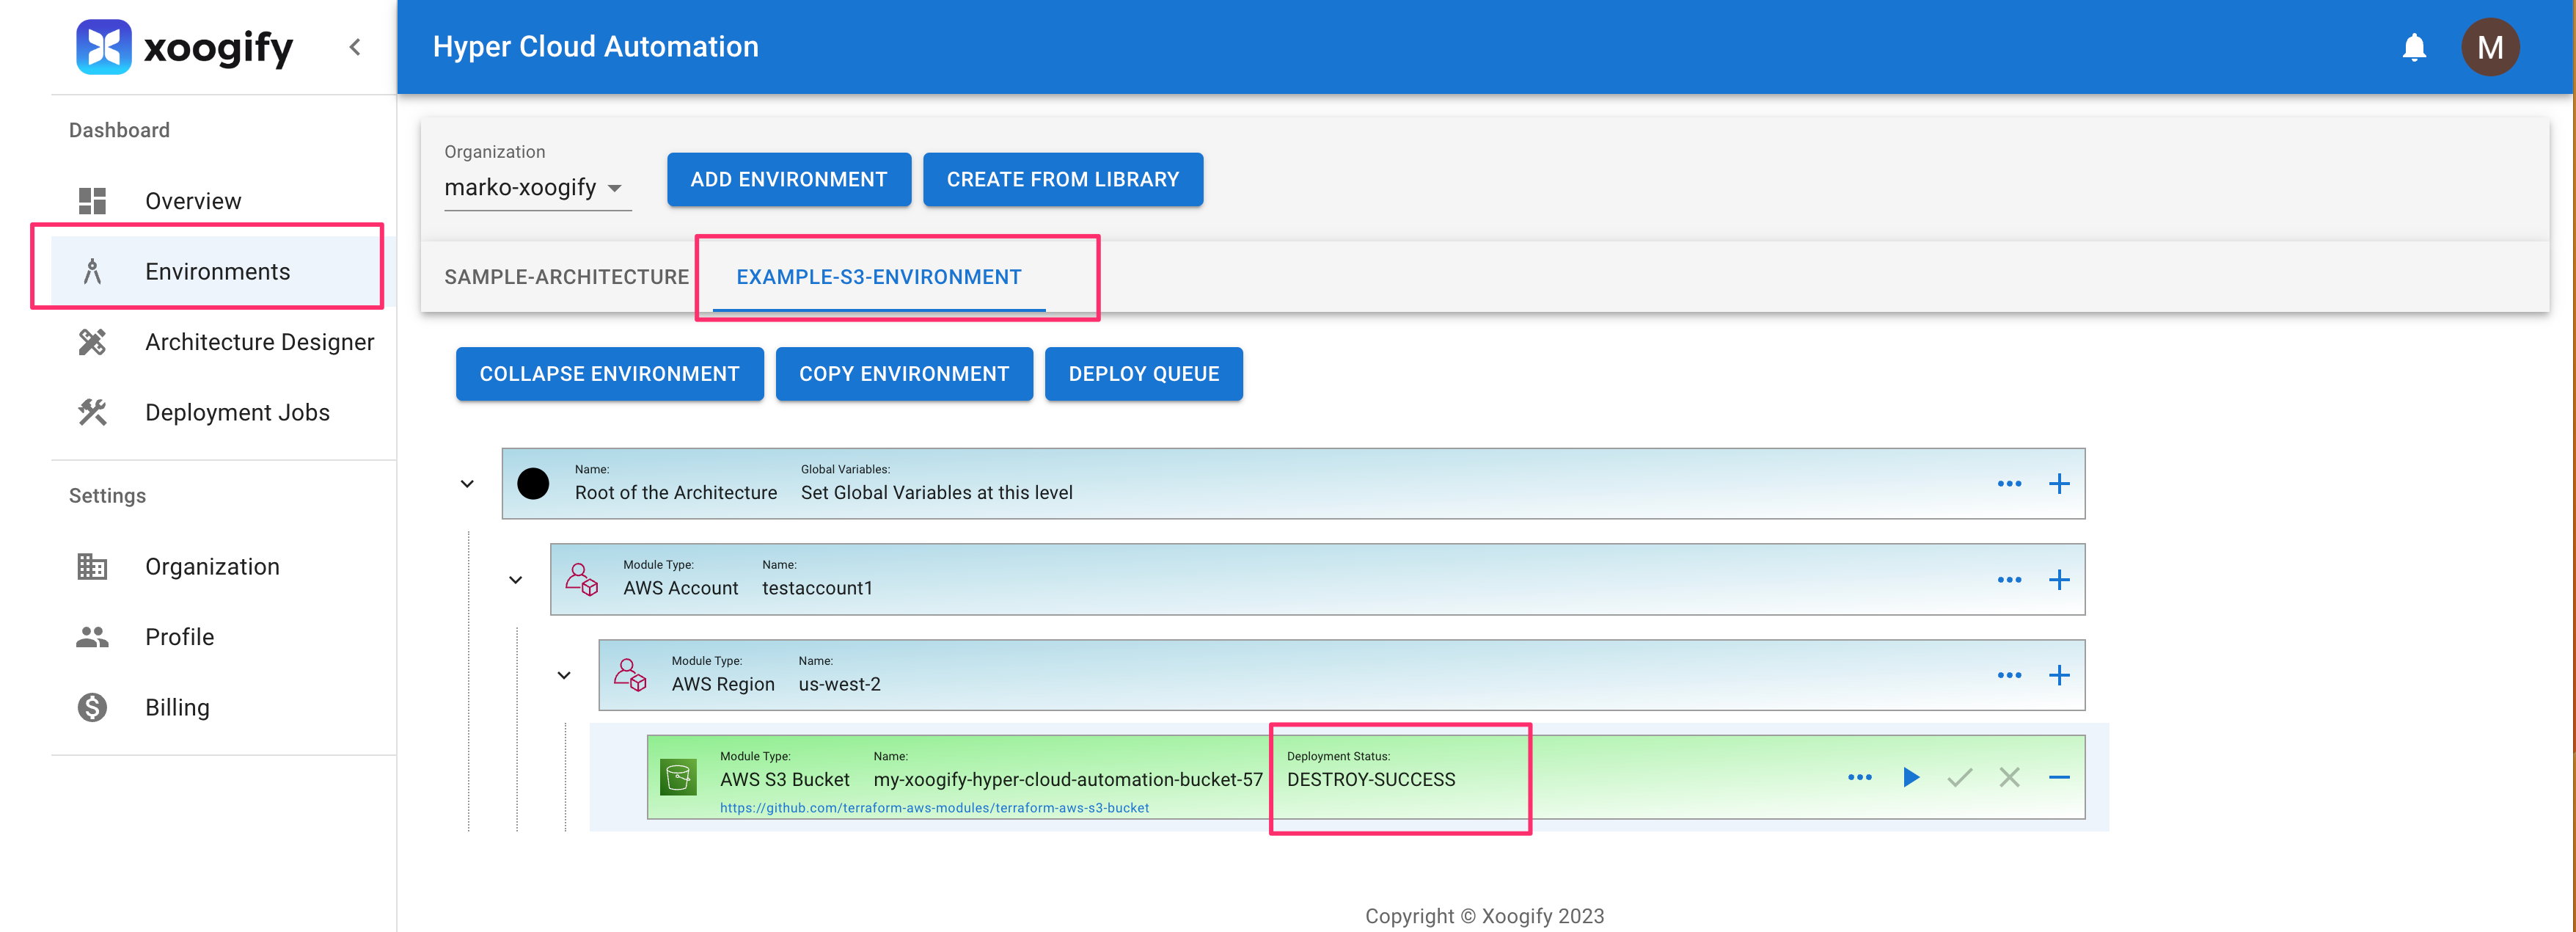
- Go to your AWS Console
- Go to S3
- The bucket should be removed
Cleanup
- In the left navigation menu click on
Organization - Delete the environment
EXAMPLE-S3-ENVIRONMENT. See also delete environment - Delete the AWS user and access key created in prerequisite